Preliminary configuration
Adjust the Folder Structure
All the screenshots in this part are from my open - source project of Asrock Z490. Friends who are interested can download and study by themselves.
Copy and Rename Sample.plist
First, copy the Sample.plist in the Doc directory to the EFI/OC/ directory and rename it to config.plist.
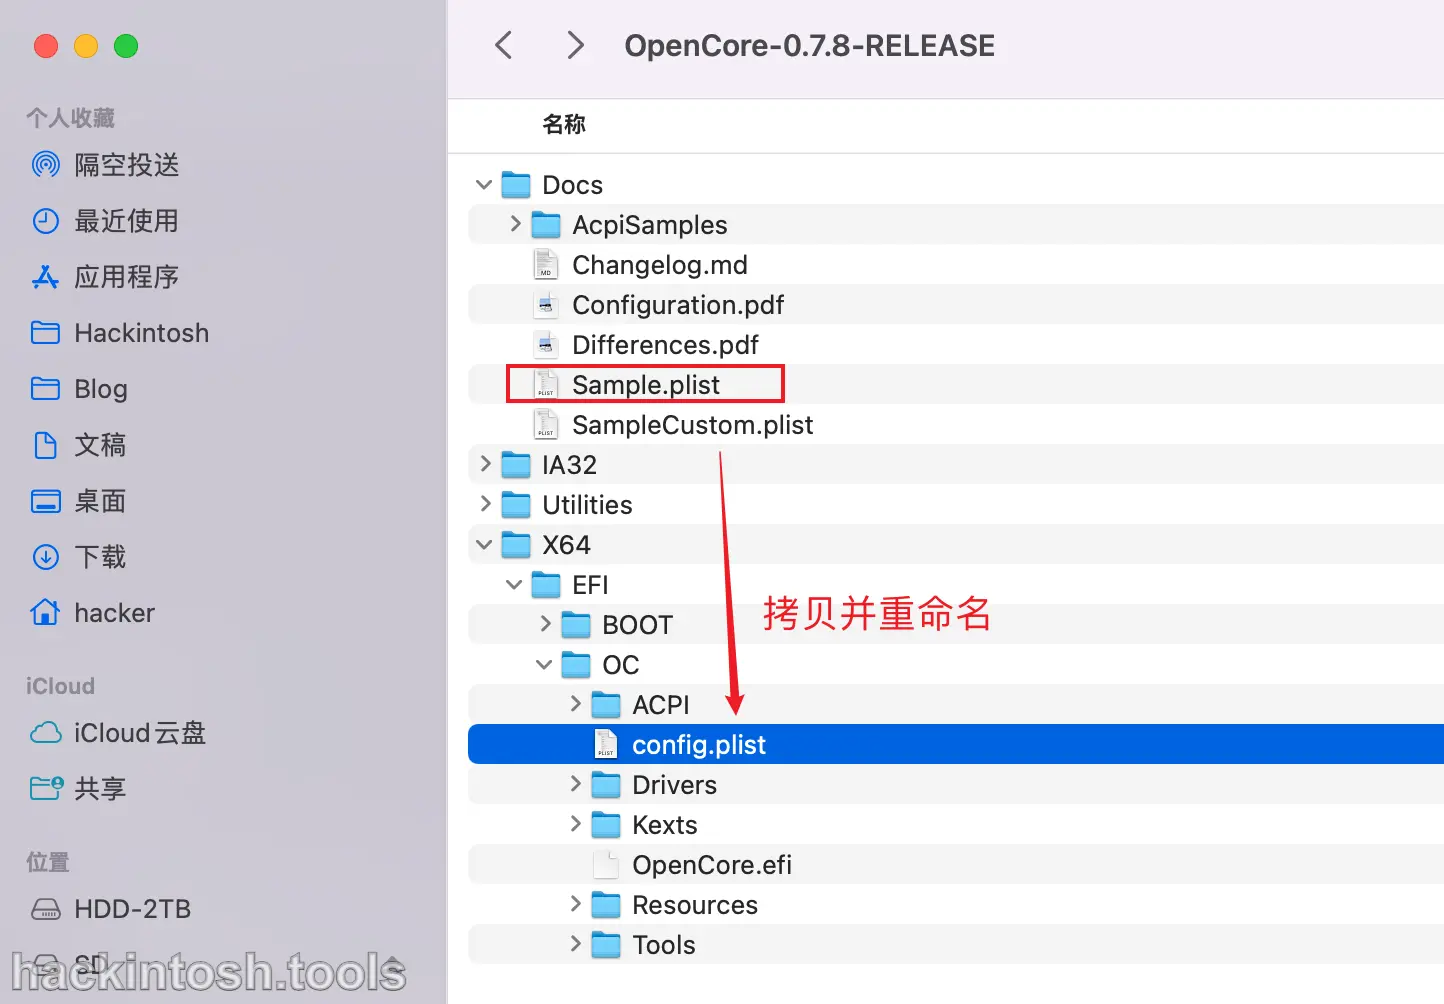
Streamline Drivers
Only a few necessary ones are left in Drivers. For details, you can refer to the previous Drivers Explanation section.

Streamline Tools
I'm not used to using Tools, so all the tools in it are deleted. For the detailed functions of the files in Tools, you can refer to the previous OC File Structure section:

Place Your SSDT
According to the previous Prepare ACPI part, put your prepared SSDT in here:

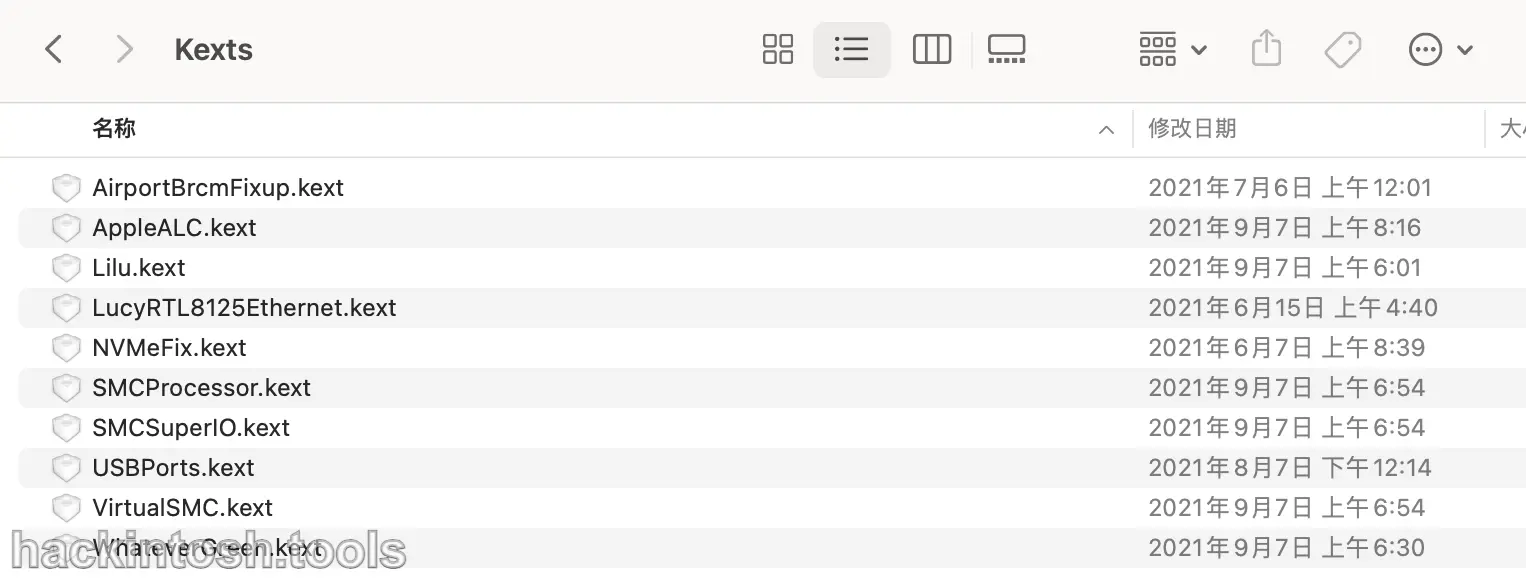
Place Your Kexts
According to the previous Prepare Kexts part, put your prepared Kexts in here:
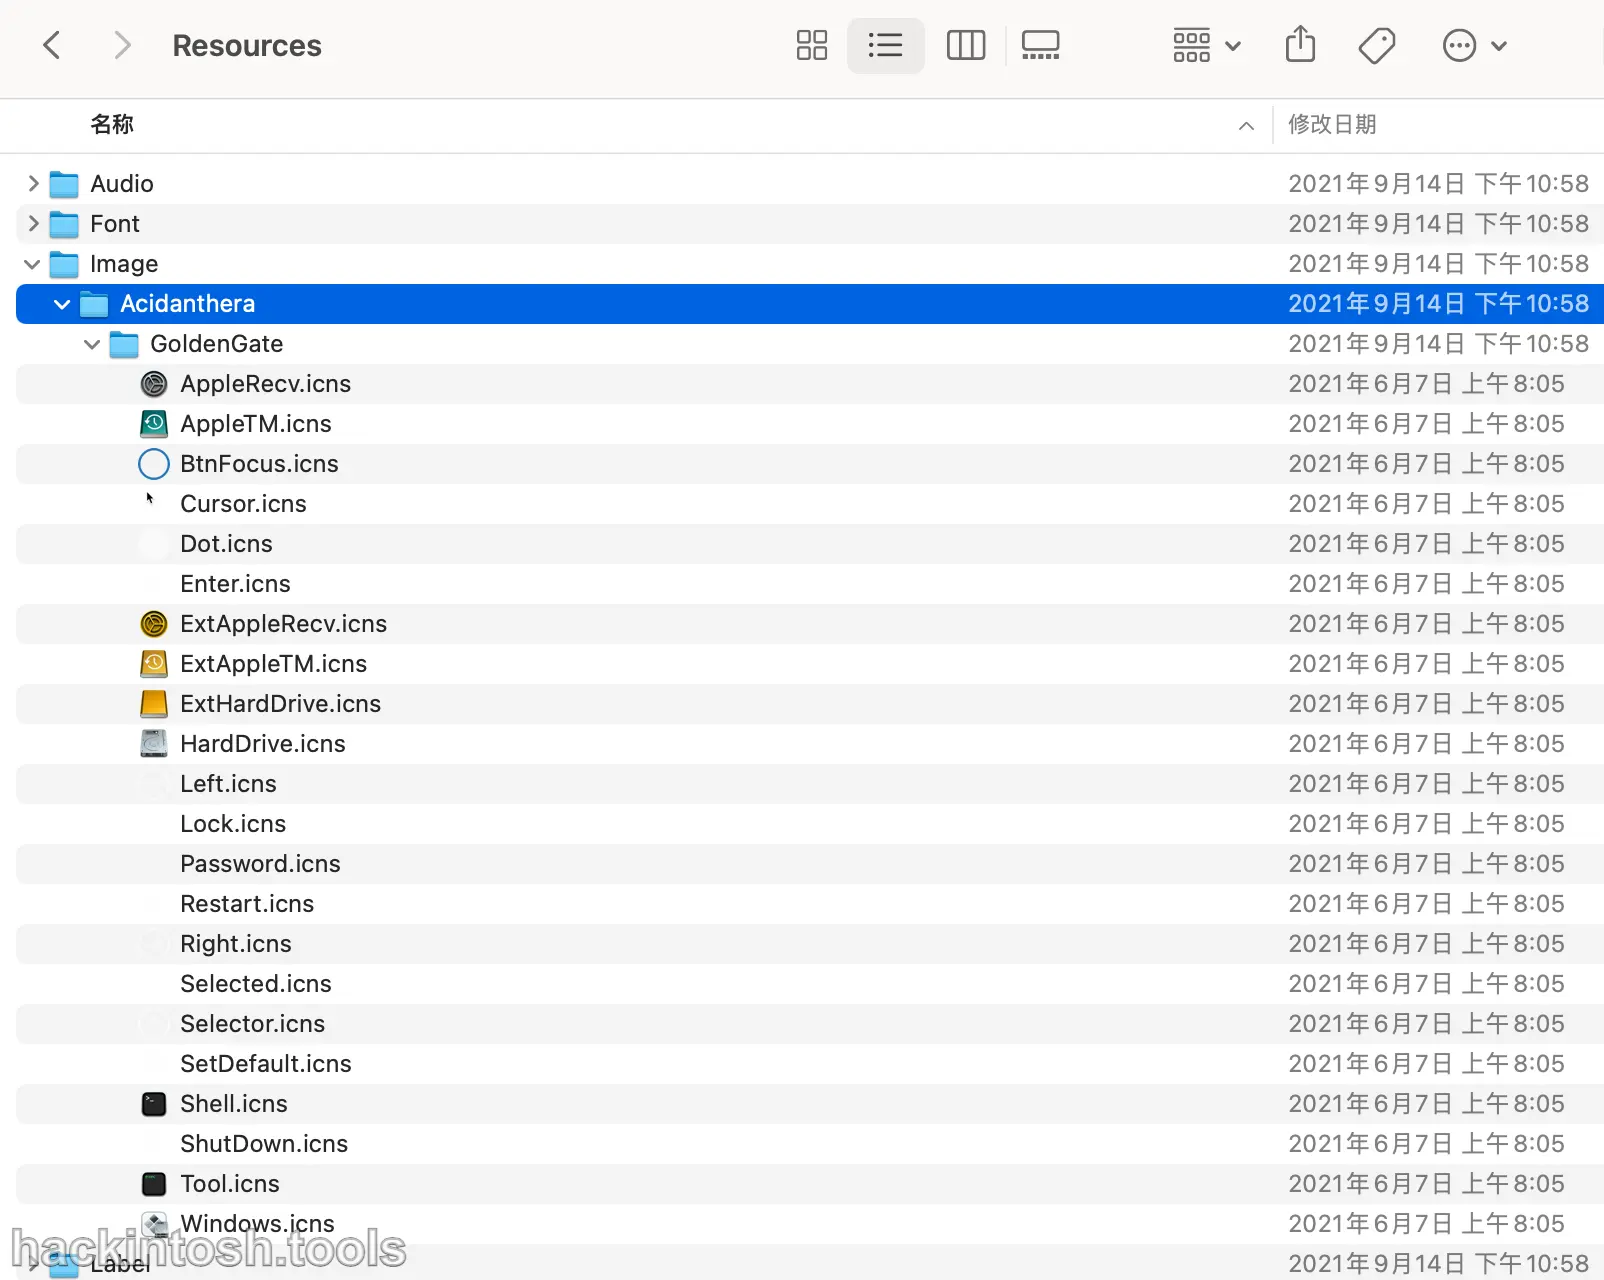
Replace Theme Files
OC has no theme by default. You can download the official simple and classic theme and replace the default Resources folder:
Loading Files of config.plist
The difference between OC and Clover is that for Clover, you only need to put the files in the right place, but for OC, you not only need to put them but also load them manually.
The three editors recommended in the previous chapter can all load automatically. The following is an introduction to their loading methods one by one.
ProperTree
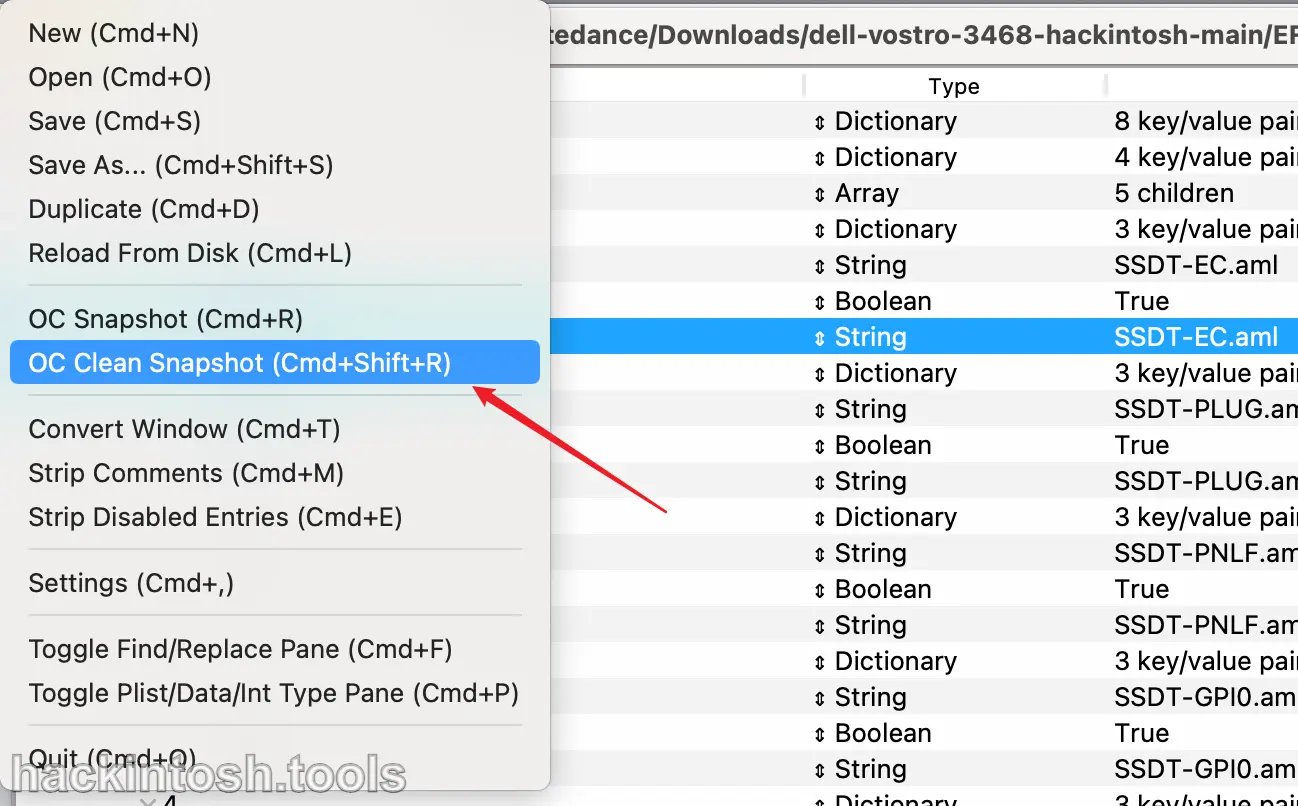
After running ProperTree, open config.plist by pressing Cmd/Ctrl + O and selecting the file on config.plist. After opening the configuration, press Cmd/Ctrl + Shift + R or use the graphical menu to select 「Clean Snapshot」:
Then select the OC folder to be added and cleaned automatically:
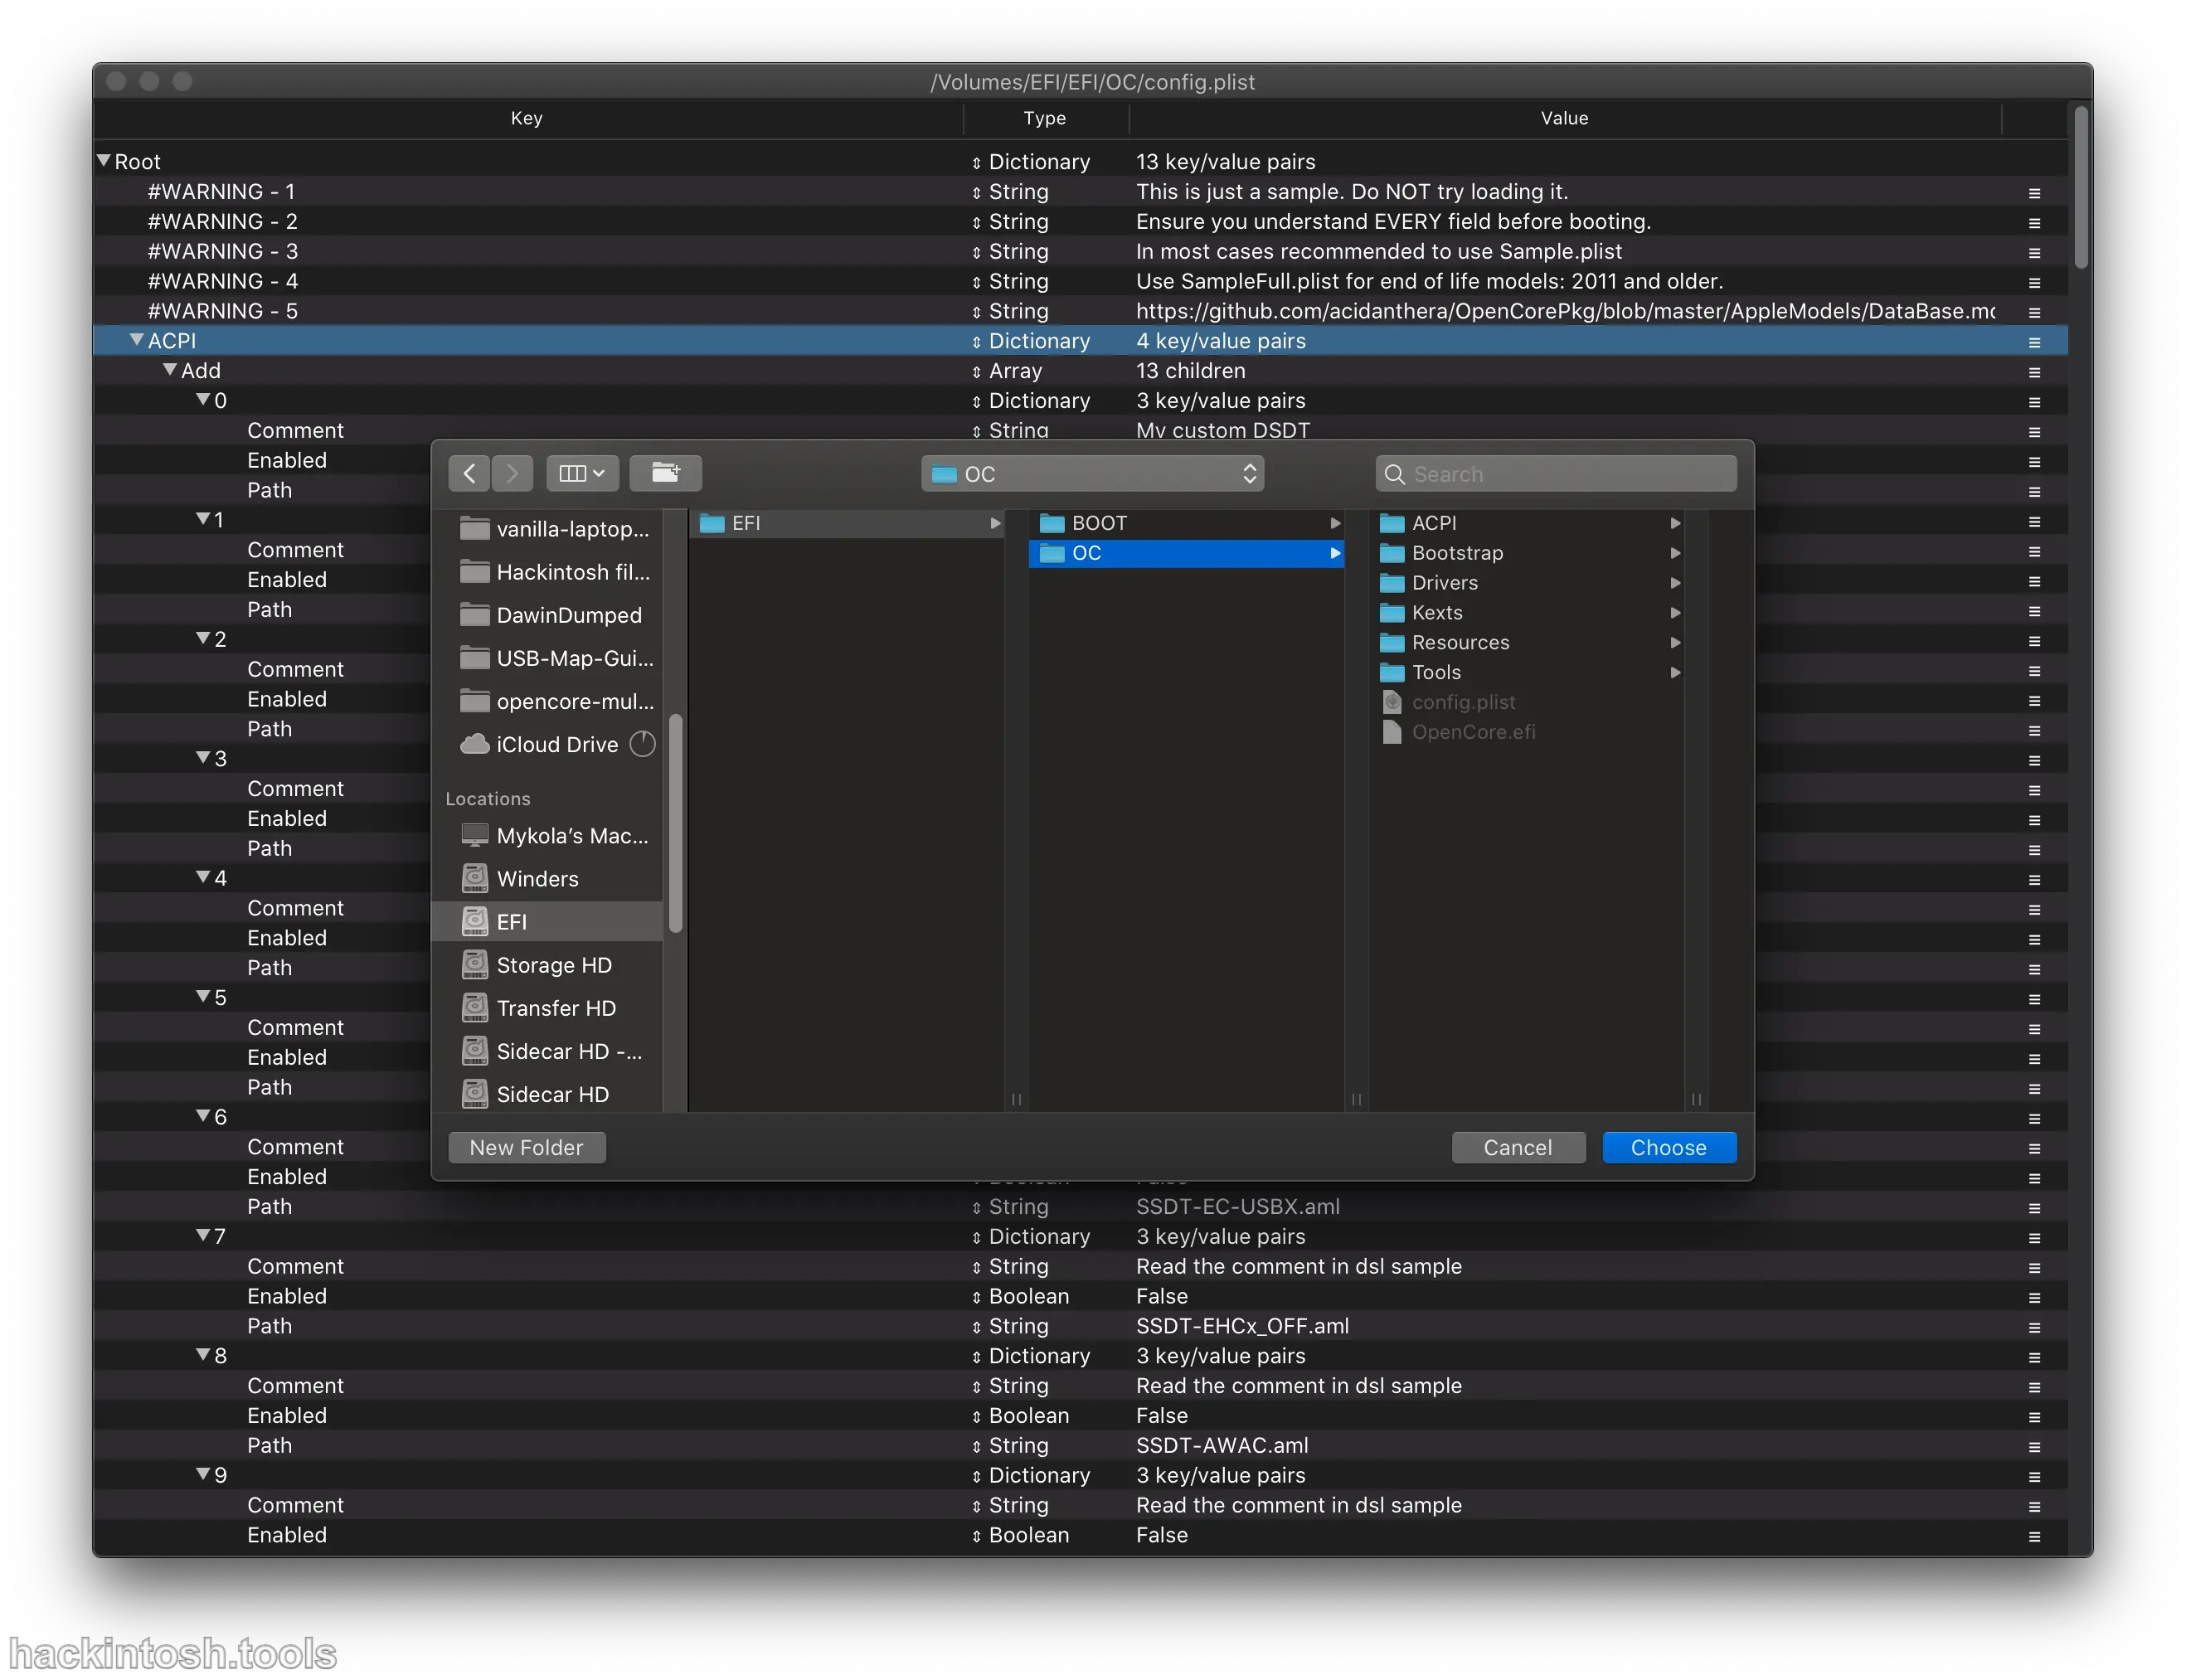
After completion, you can see the information of the previously configured SSDT, Kexts, and Drivers in config.plist:
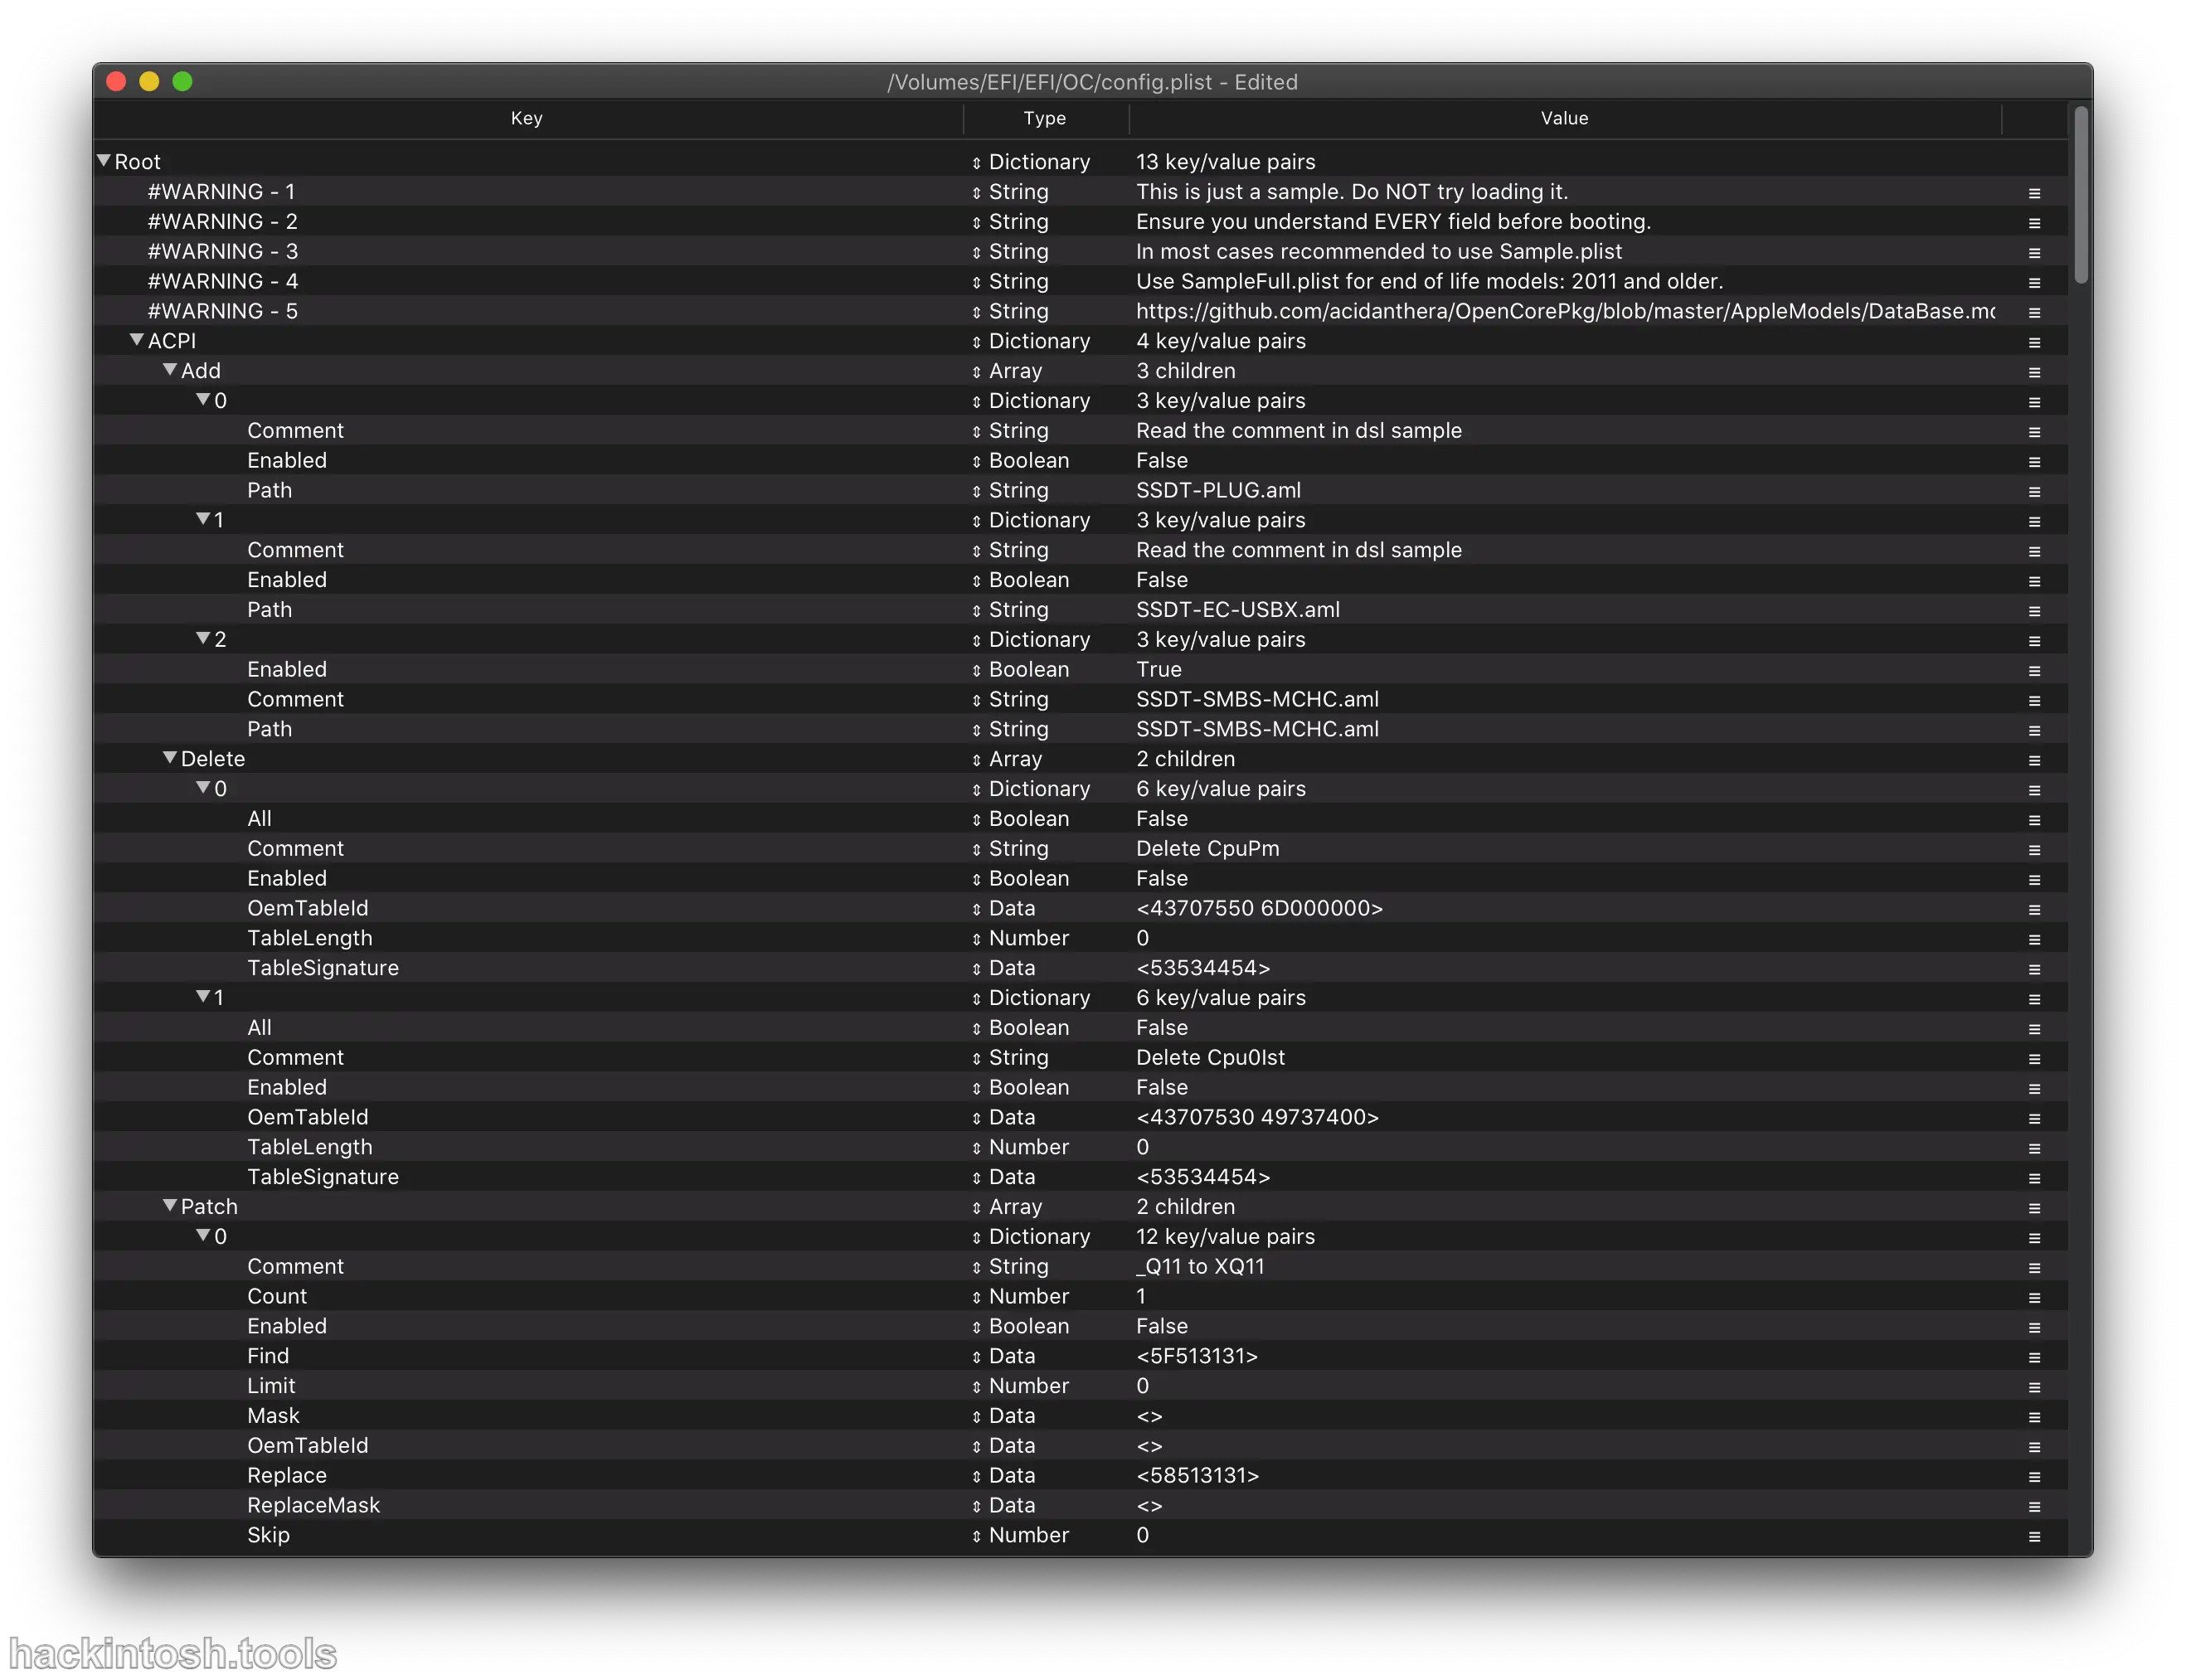
Finally, select save.
OpenCore Configurator
Temporarily, no one - click automatic operations such as adding ACPI, Drivers, Kexts, Tools, etc. have been found in OpenCore Configurator and OCAuxiliaryTools. So we can only add these files manually.
Add SSDTs
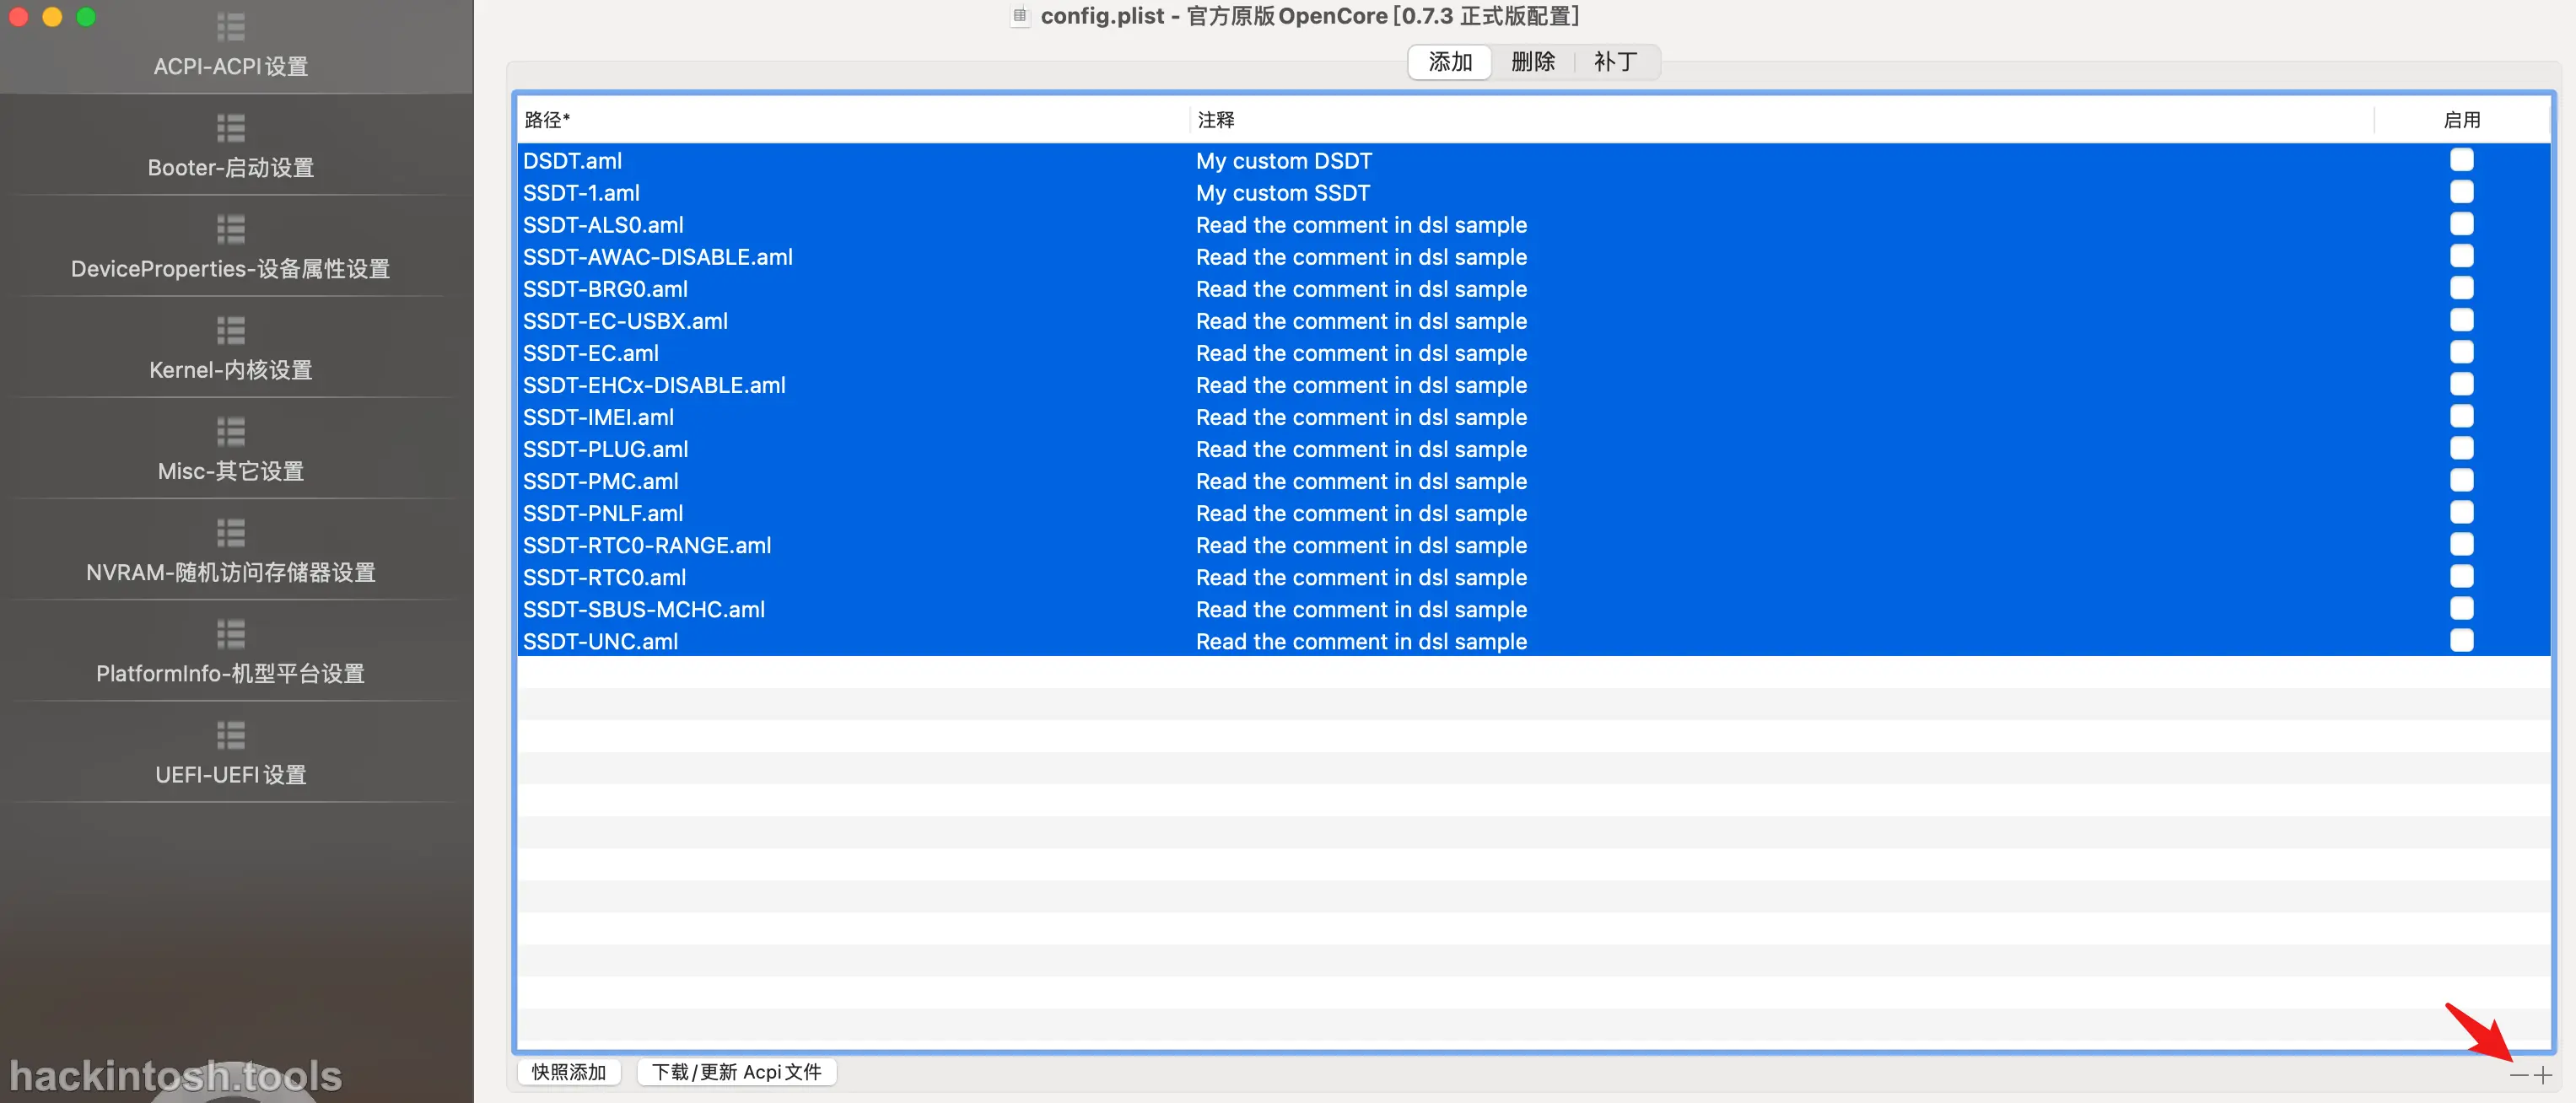
Before adding, you need to delete the SSDTs in the original template file. The operation is very simple. Select all and click the 「minus」 in the lower right corner to delete:
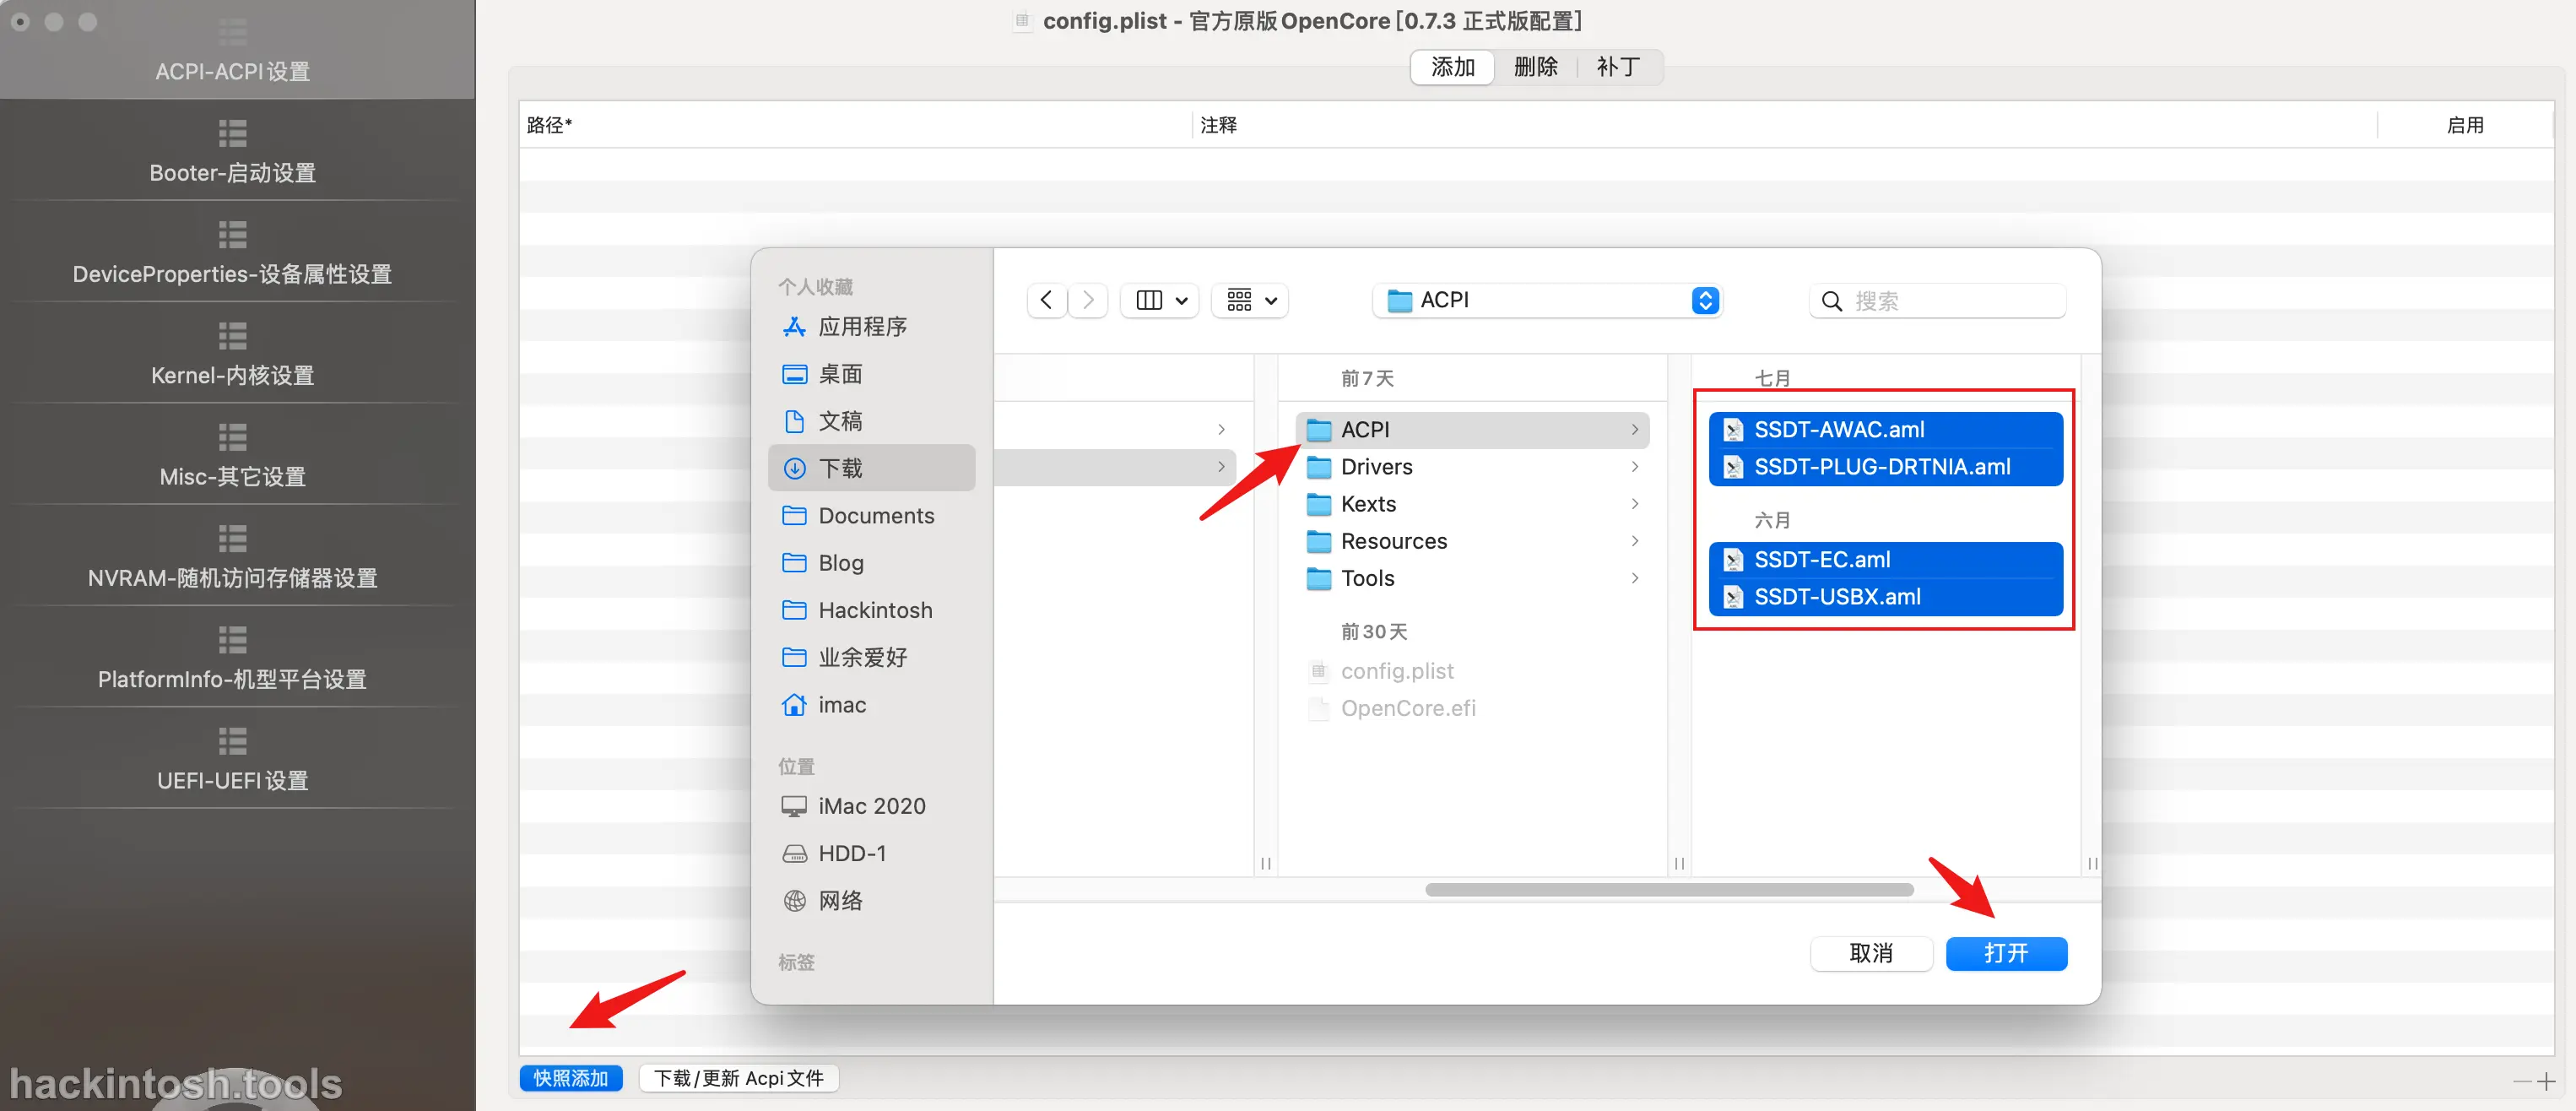
Then select 「Snapshot Add」 in the lower left corner, select all the SSDT files in your ACPI folder, and open it to complete the addition operation:
The effect after adding is as follows:

You can see that the path information is automatically added and all are automatically enabled.
Add Kexts
Adding Kexts is a similar operation. I won't repeat it here. First, delete the ones that come with the sample, and then add by snapshot. Select the Kexts folder:
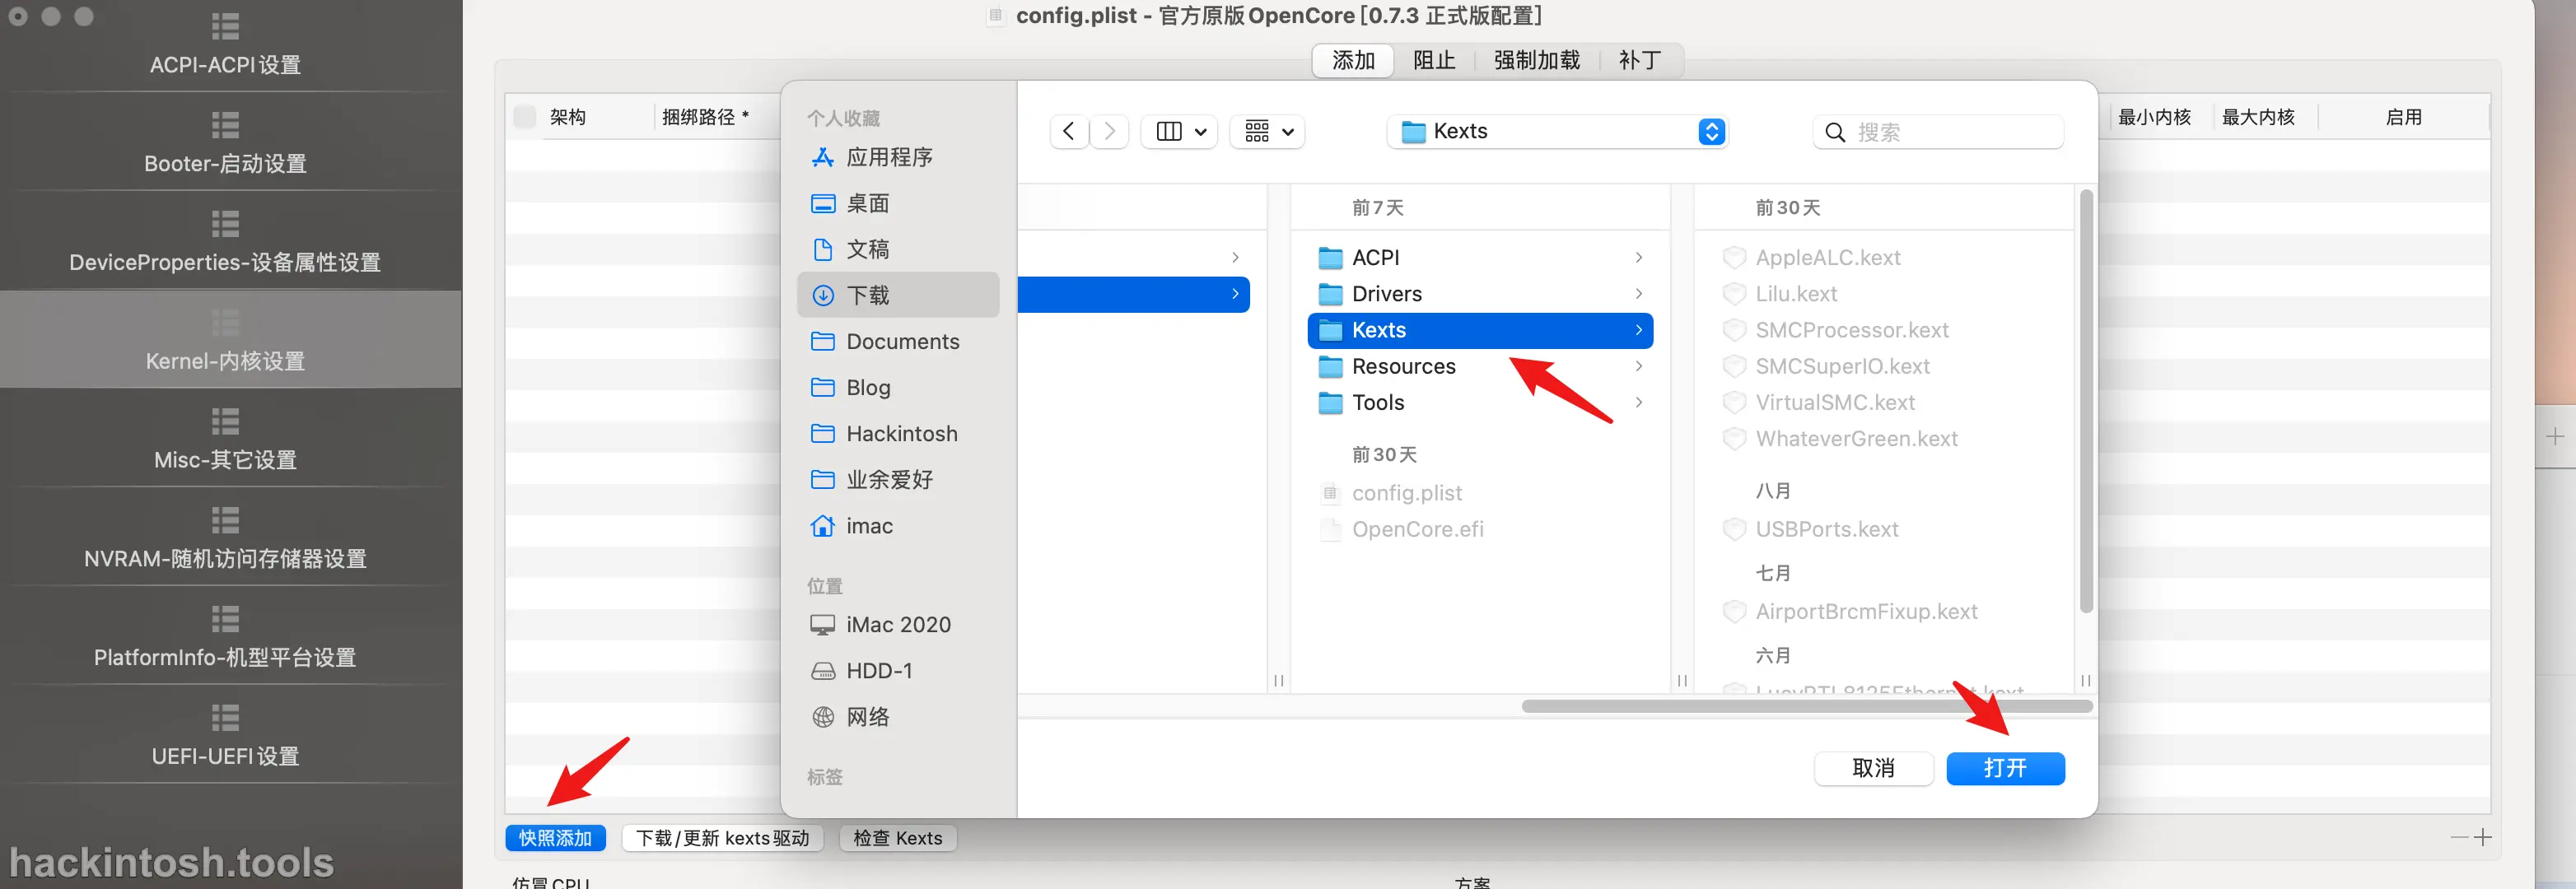
Of course, there are some techniques such as order for Kexts loading. These techniques will be introduced in detail in the next chapter.
Add Drivers
Adding Drivers is also a similar operation:
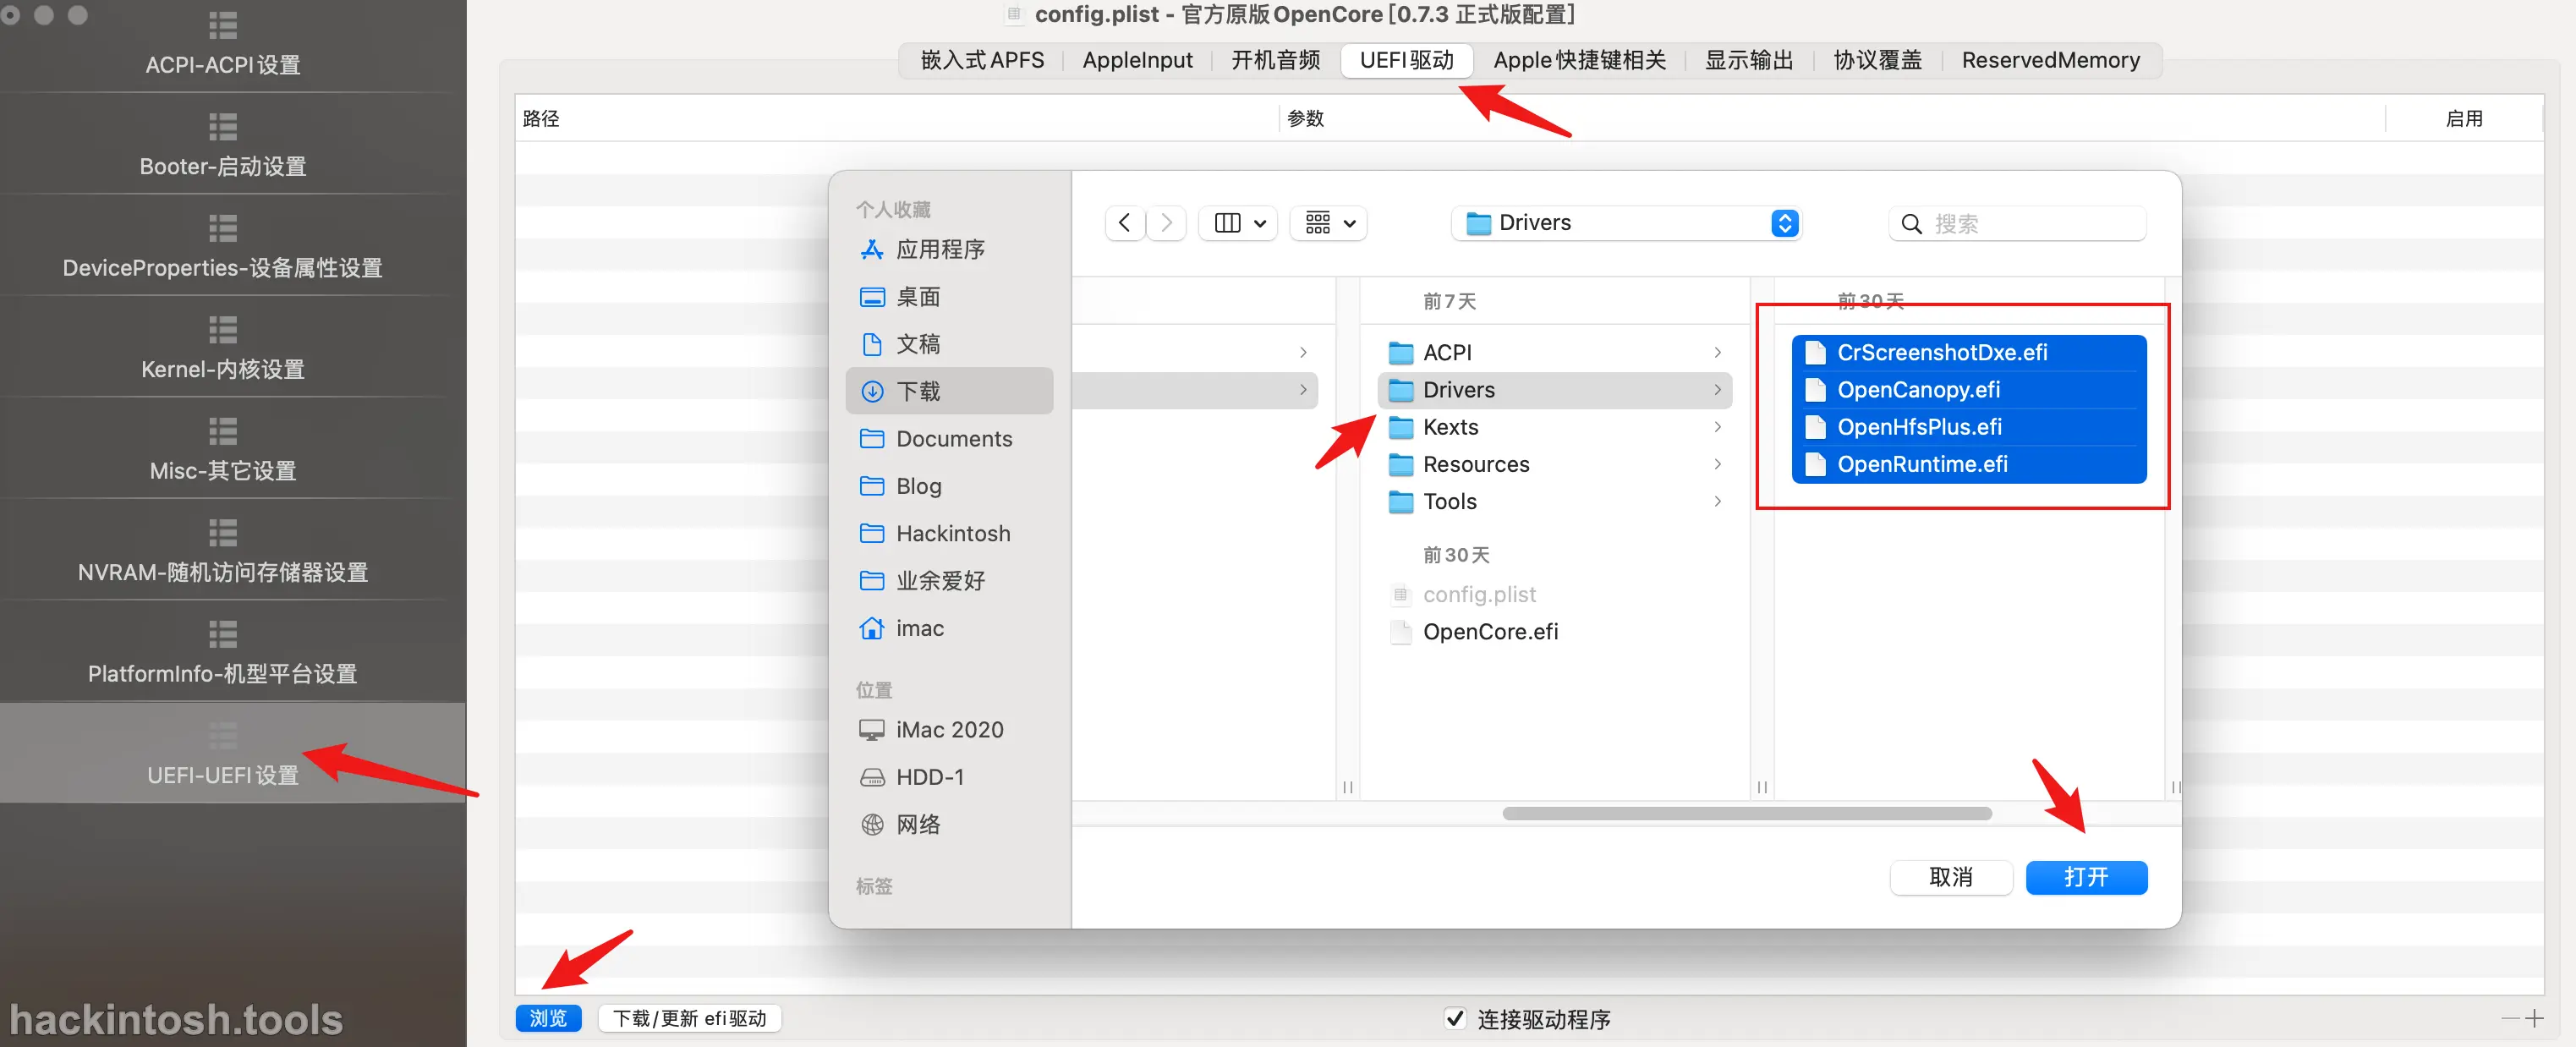
Add Tools
Adding Tools is also a similar operation, but it is a little bit hidden. For the specific addition entry, refer to the following figure:
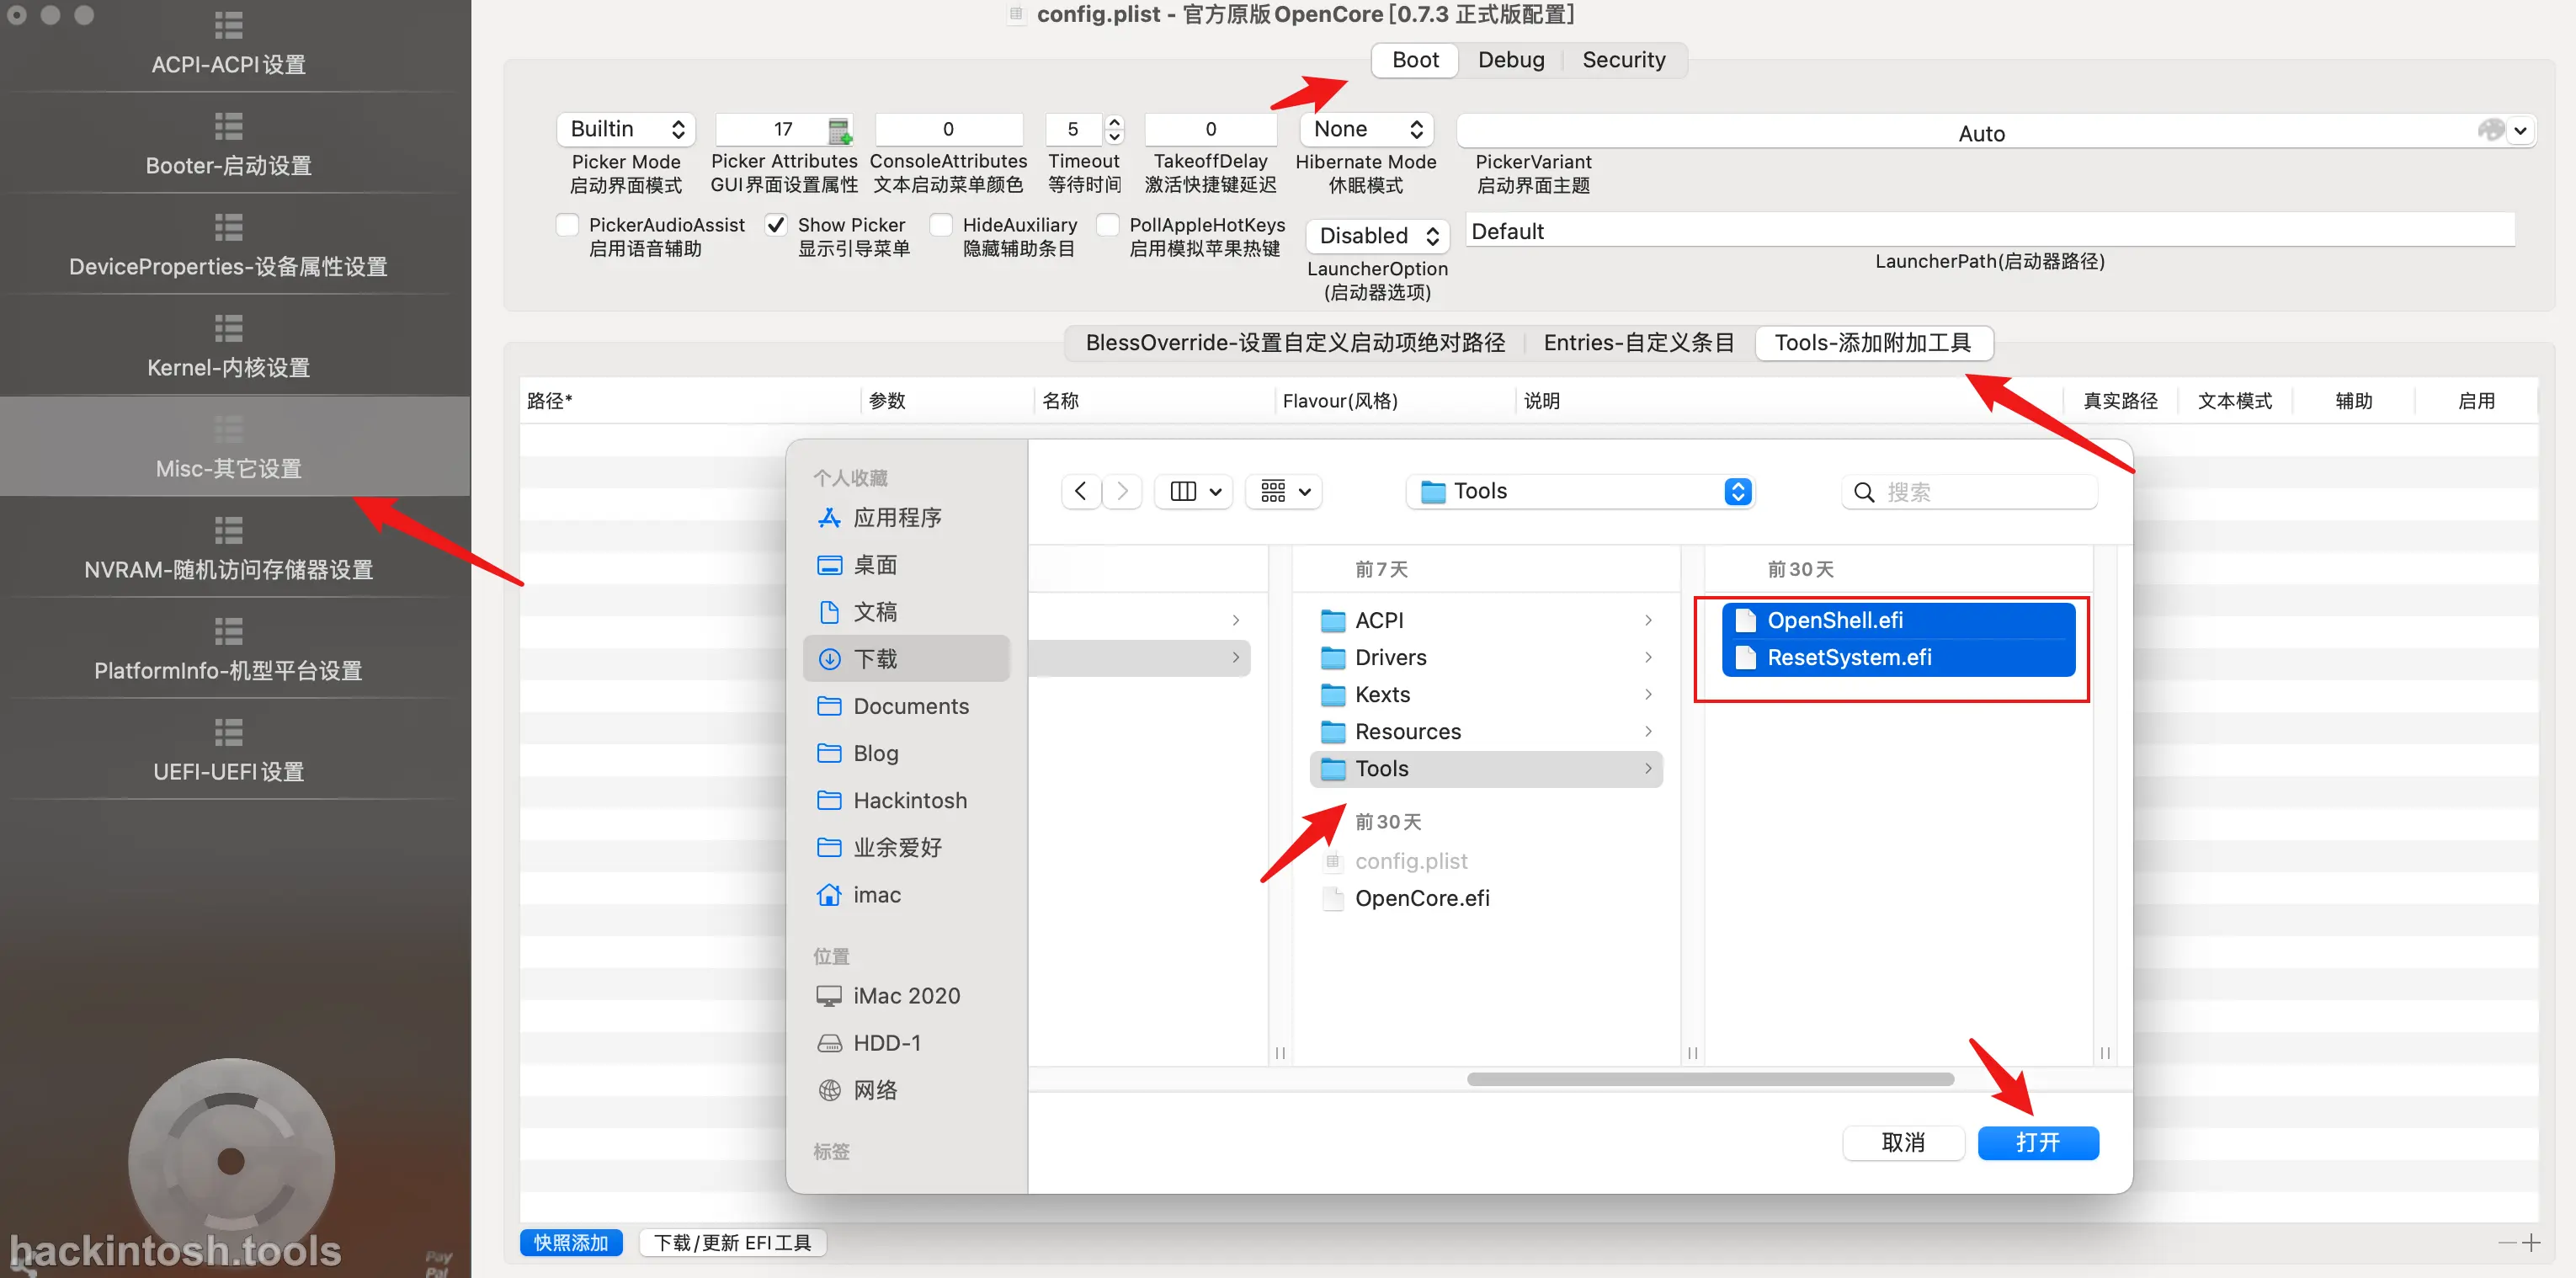
OCAuxiliaryTools
The operation of OCAuxiliaryTools is similar to that of OpenCore Configurator. Basically, you can get started quickly. If you can't get started quickly, it must be that the graphical interface is not user - friendly enough and the user experience is not good enough.
Add SSDTS
Delete the SSDT that comes with the template file, and then select all the SSDT files in your ACPI folder and open it to complete the addition operation:
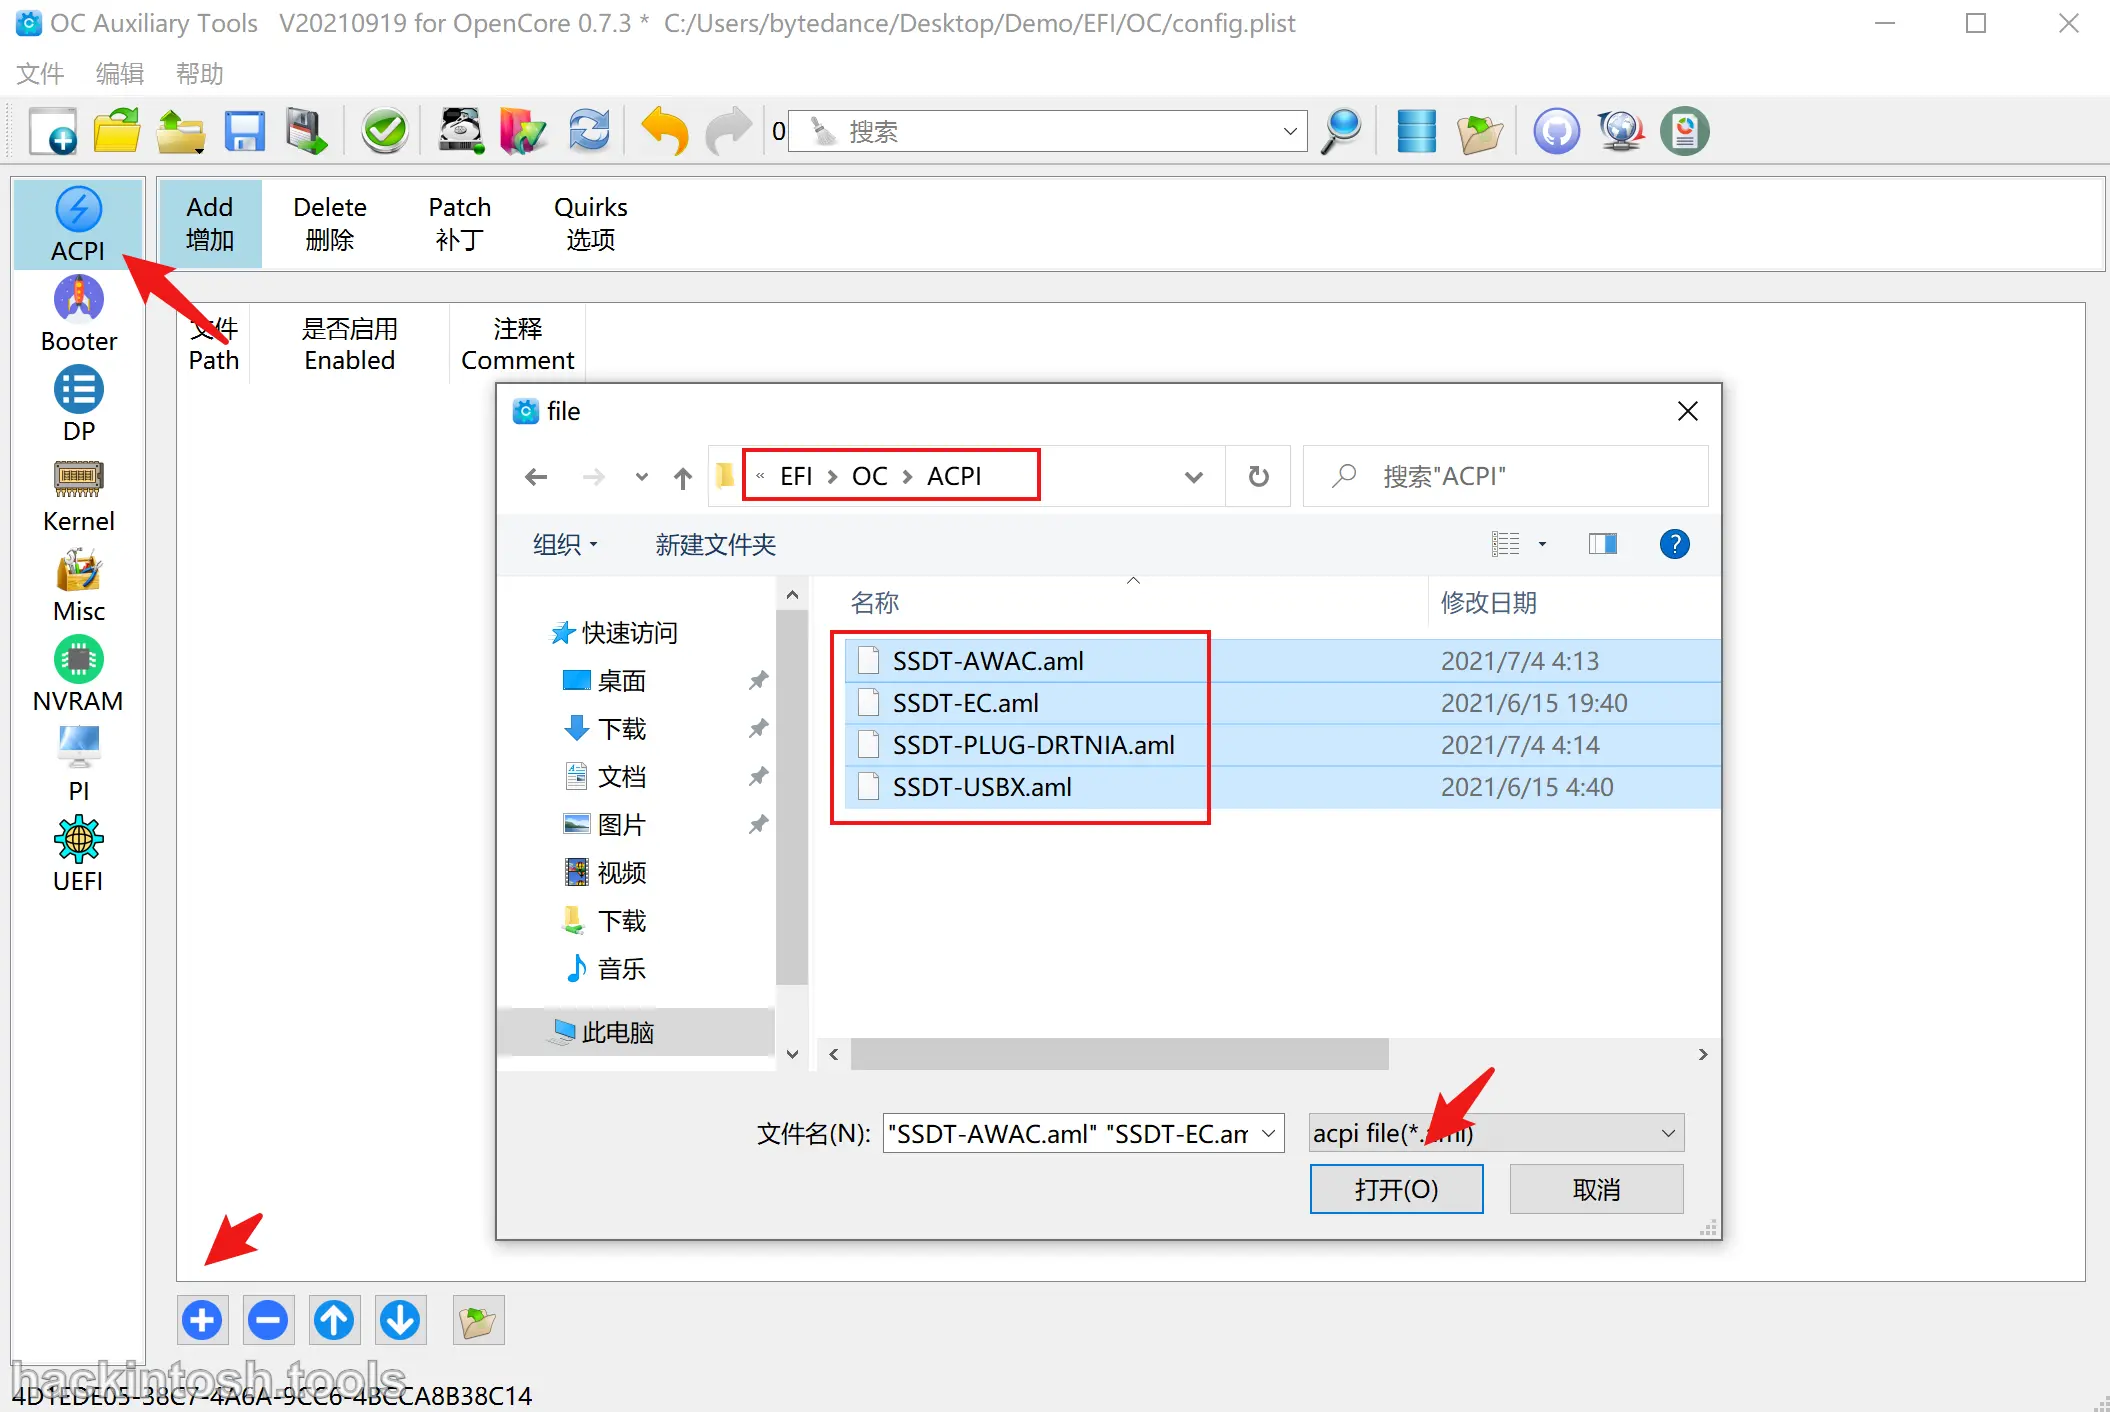
Add Kexts
Adding Kexts is also a similar operation. However, OCAuxiliaryTools doesn't support adding the whole Kexts folder. The plus sign in the lower left corner can only add them one by one manually. For efficiency, you can select all the Kexts files and then drag them into the Kernel in OCAuxiliaryTools:

Of course, there are some techniques such as order for Kexts loading. These techniques will be introduced in detail in the next chapter.
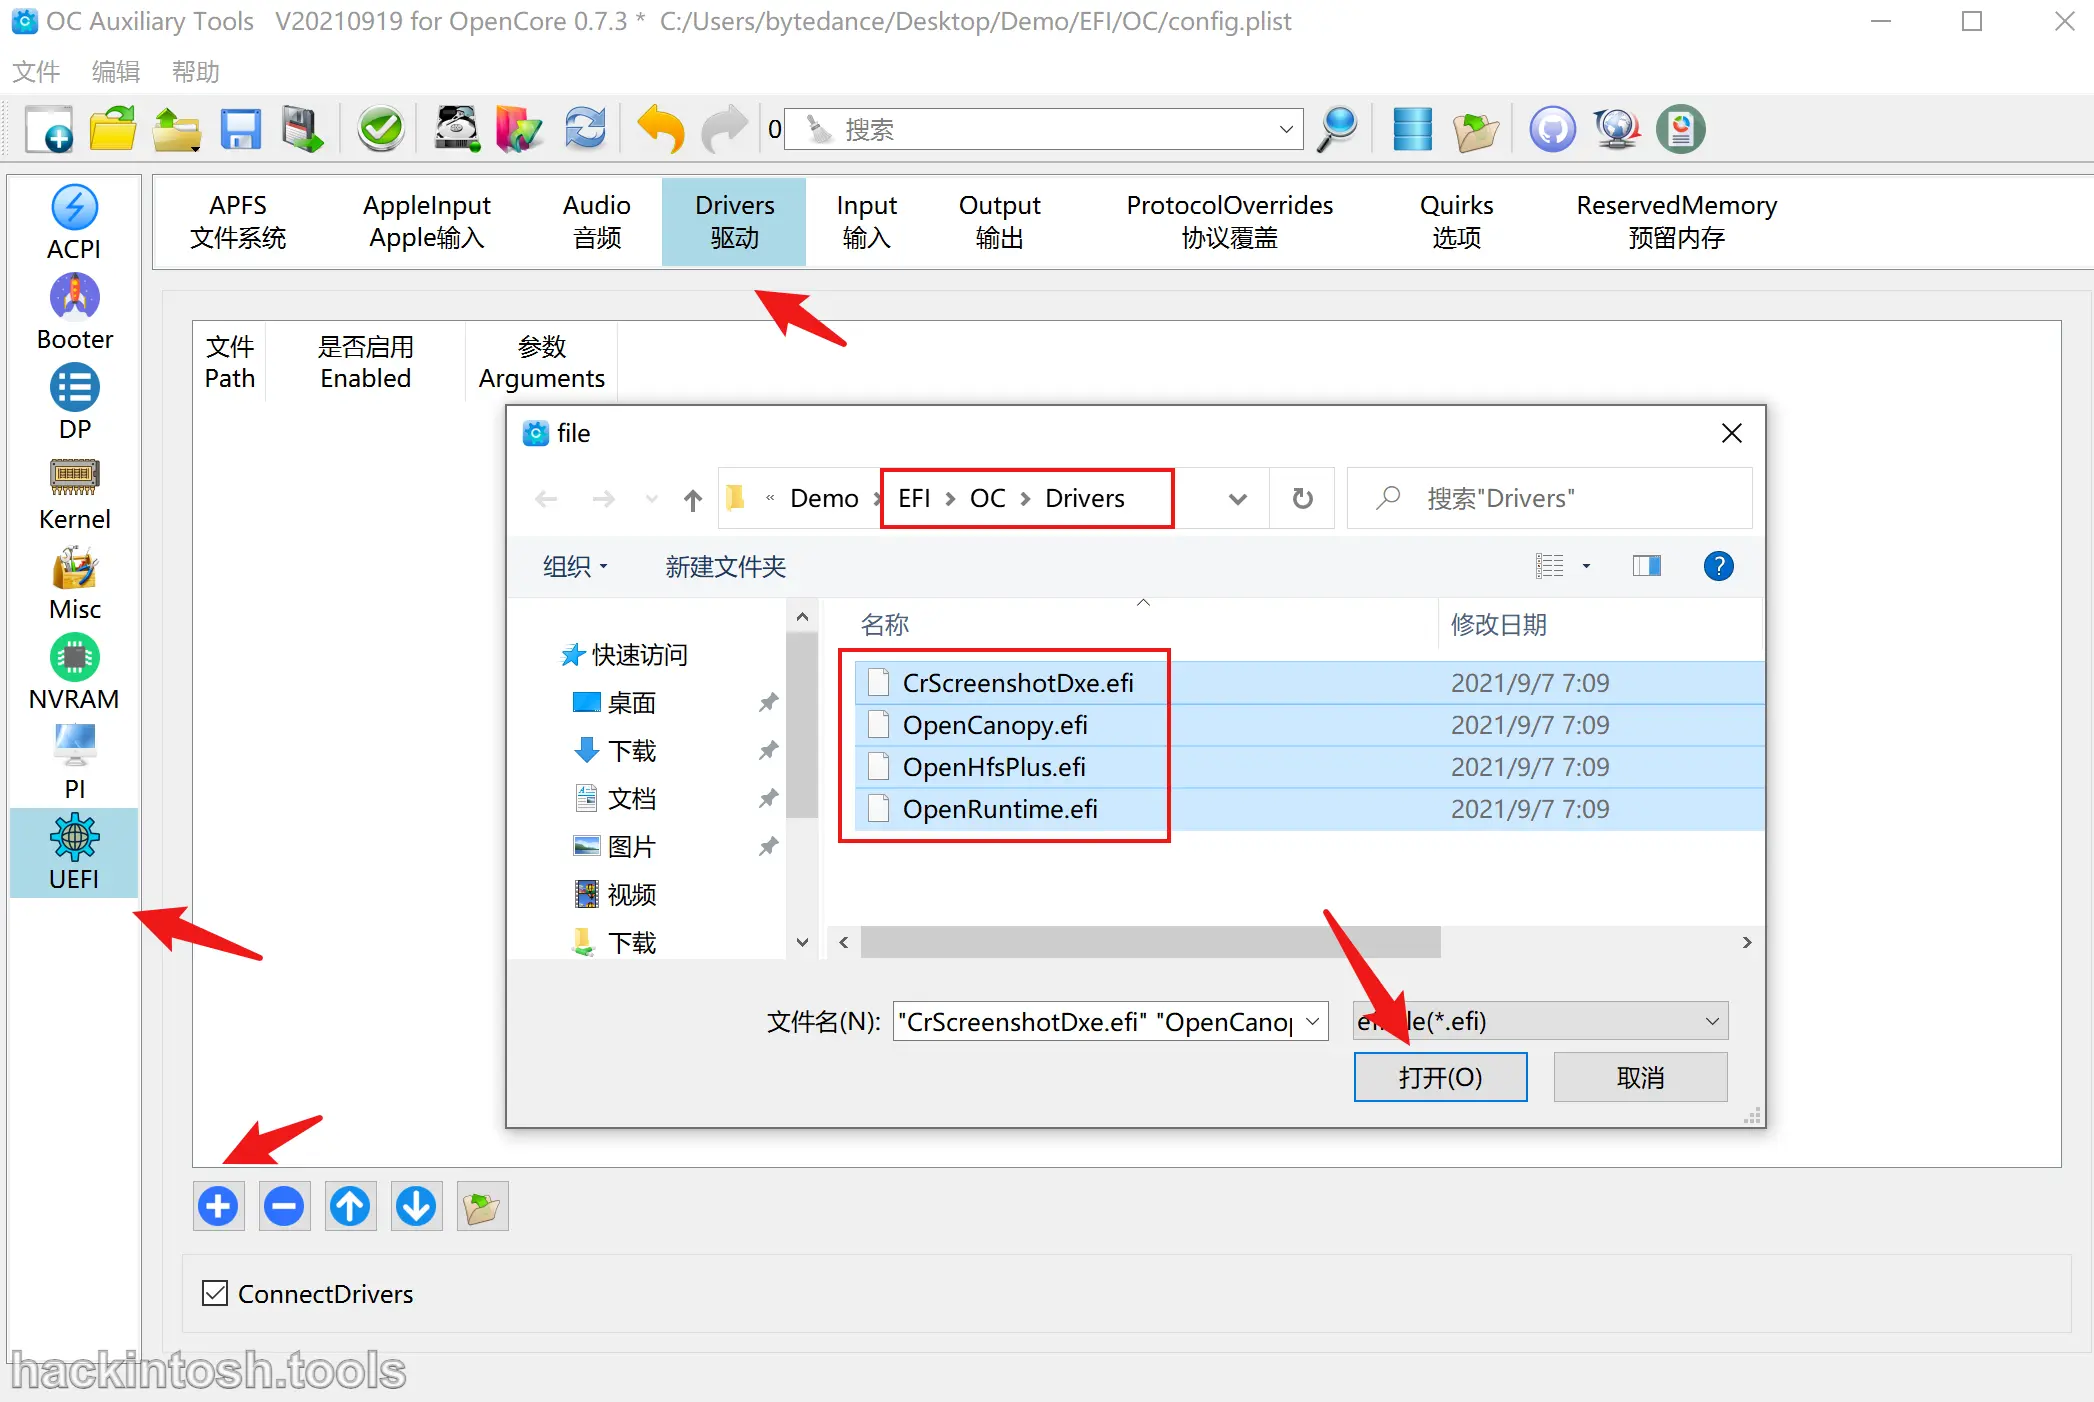
Add Drivers
Adding Drivers is also a similar operation:
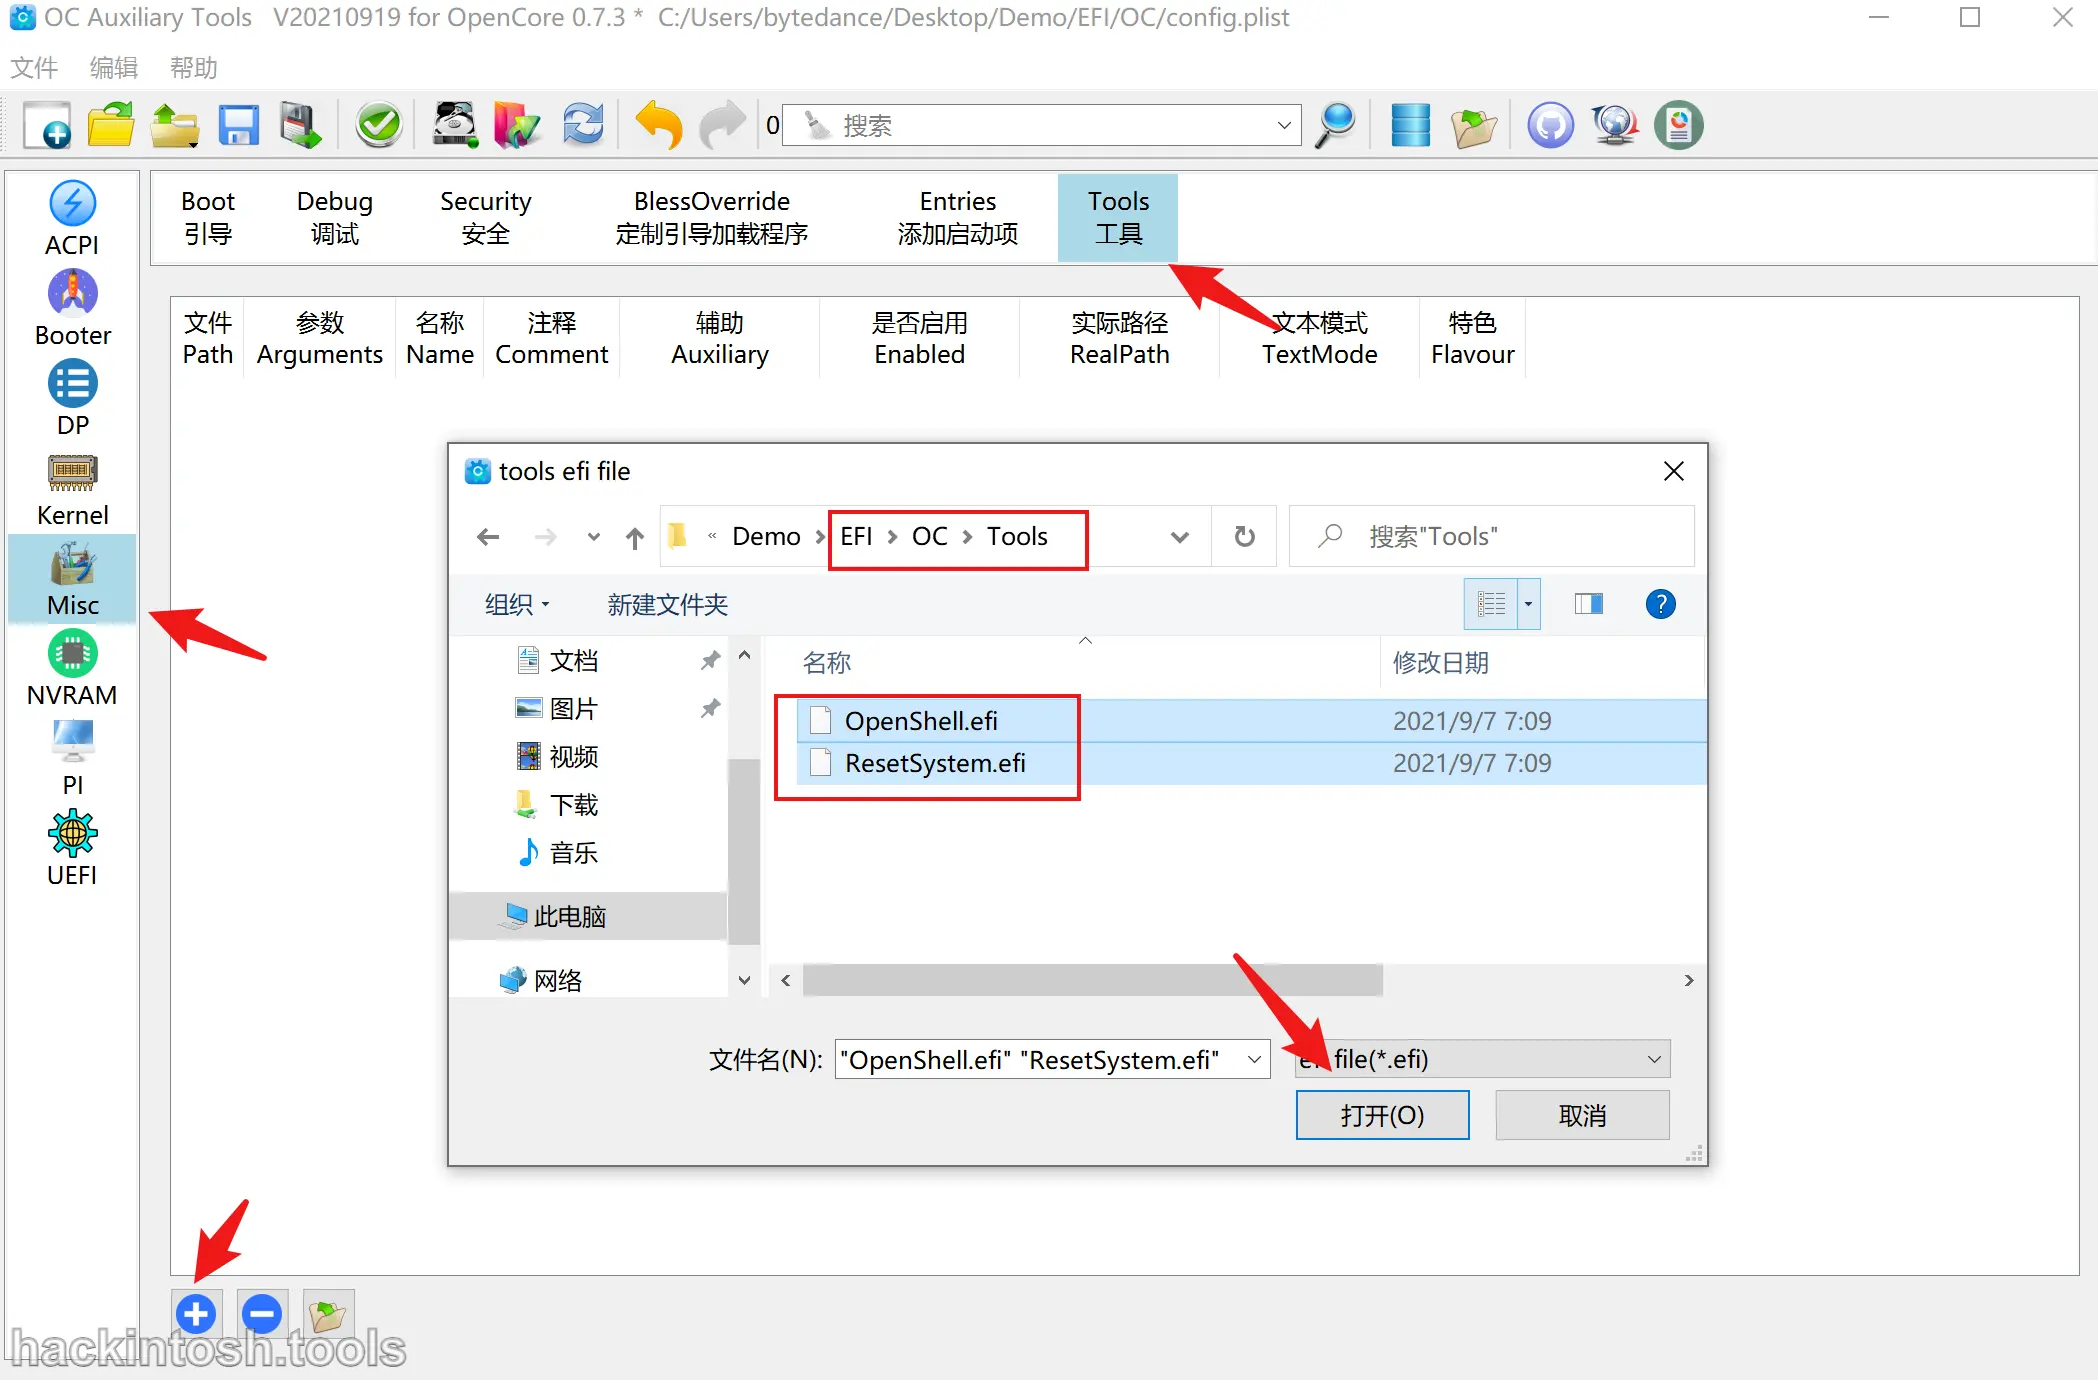
Add Tools
Adding Tools is also a similar operation, but it is a little bit hidden. For the specific addition entry, refer to the following figure:
So far, the ACPI, Kexts and other files we collected before have been manually loaded. The following chapter will start to introduce the basic loading order of common Kexts.