Complete Success
Questions
Smart netizens will surely notice: Hey, that's not right! I can't insert a USB flash drive and then use the shortcut key to boot every time I want to enter the macOS system:
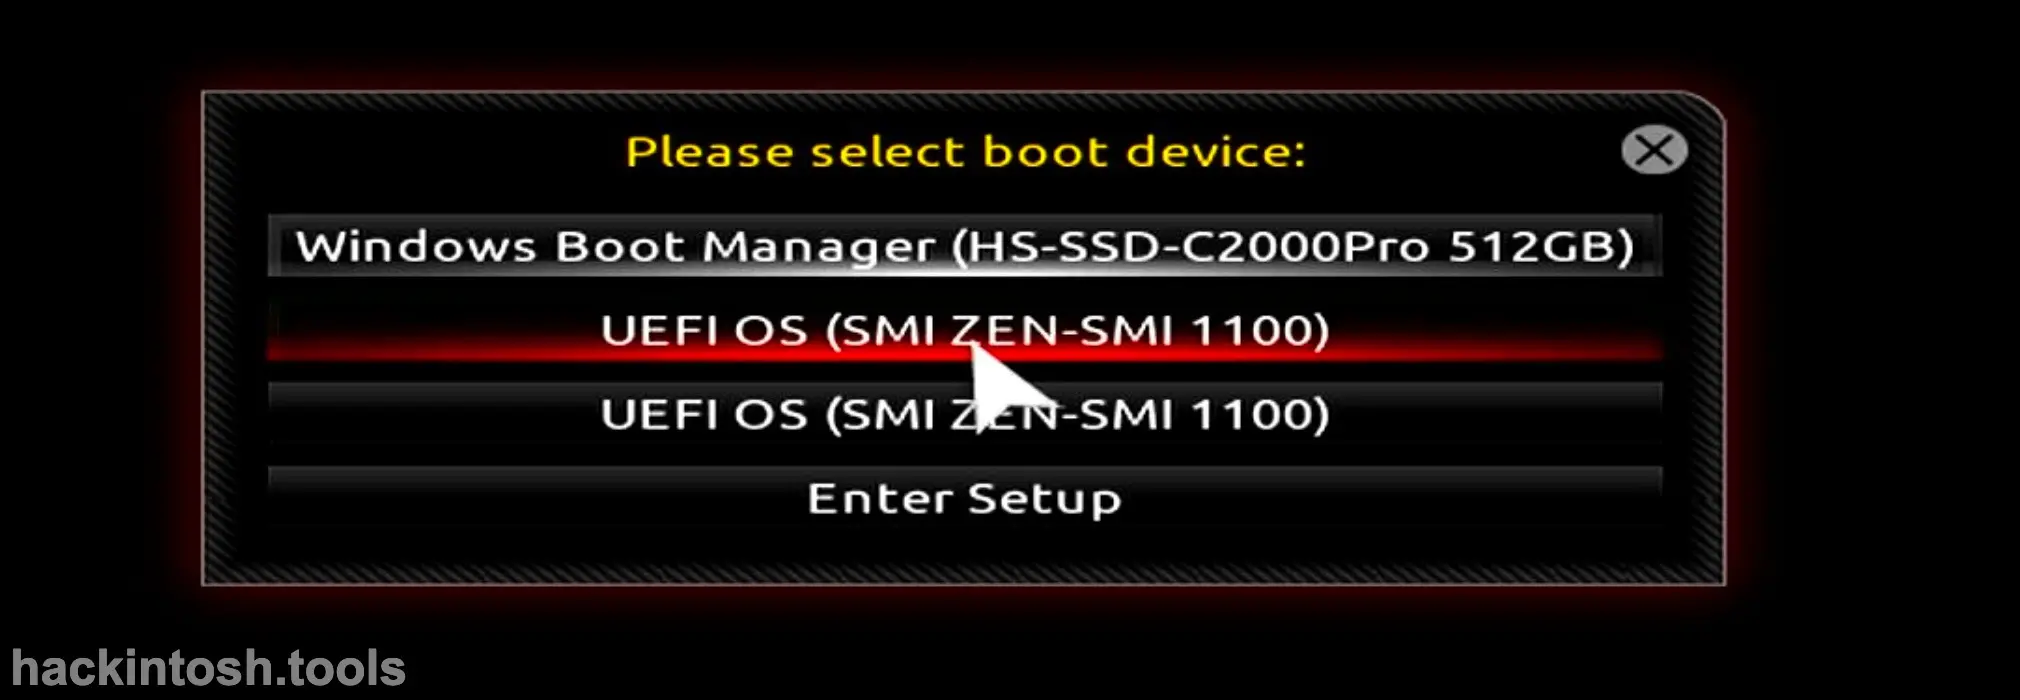
- Of course, you can do without the USB flash drive. Follow my steps below to operate step by step.
Mount the Disk Boot Partition
This step can be done both in macOS and Windows.
If you operate in Windows, you generally need to use the DiskGenius tool to assist with the operation. If you are mounting in macOS, there are many more tools. Below, I will use OCC to mount the EFI partition.
First, download the OCC tool. This tool is an essential tool for Hackintosh even if you don't use it for mounting.
The download address of the OCC official website is: https://mackie100projects.altervista.org/download - opencore - configurator/
After opening it, select the OC icon in the upper - right corner, click it, find the hard disk where your system is installed, and click "Mount Partition":

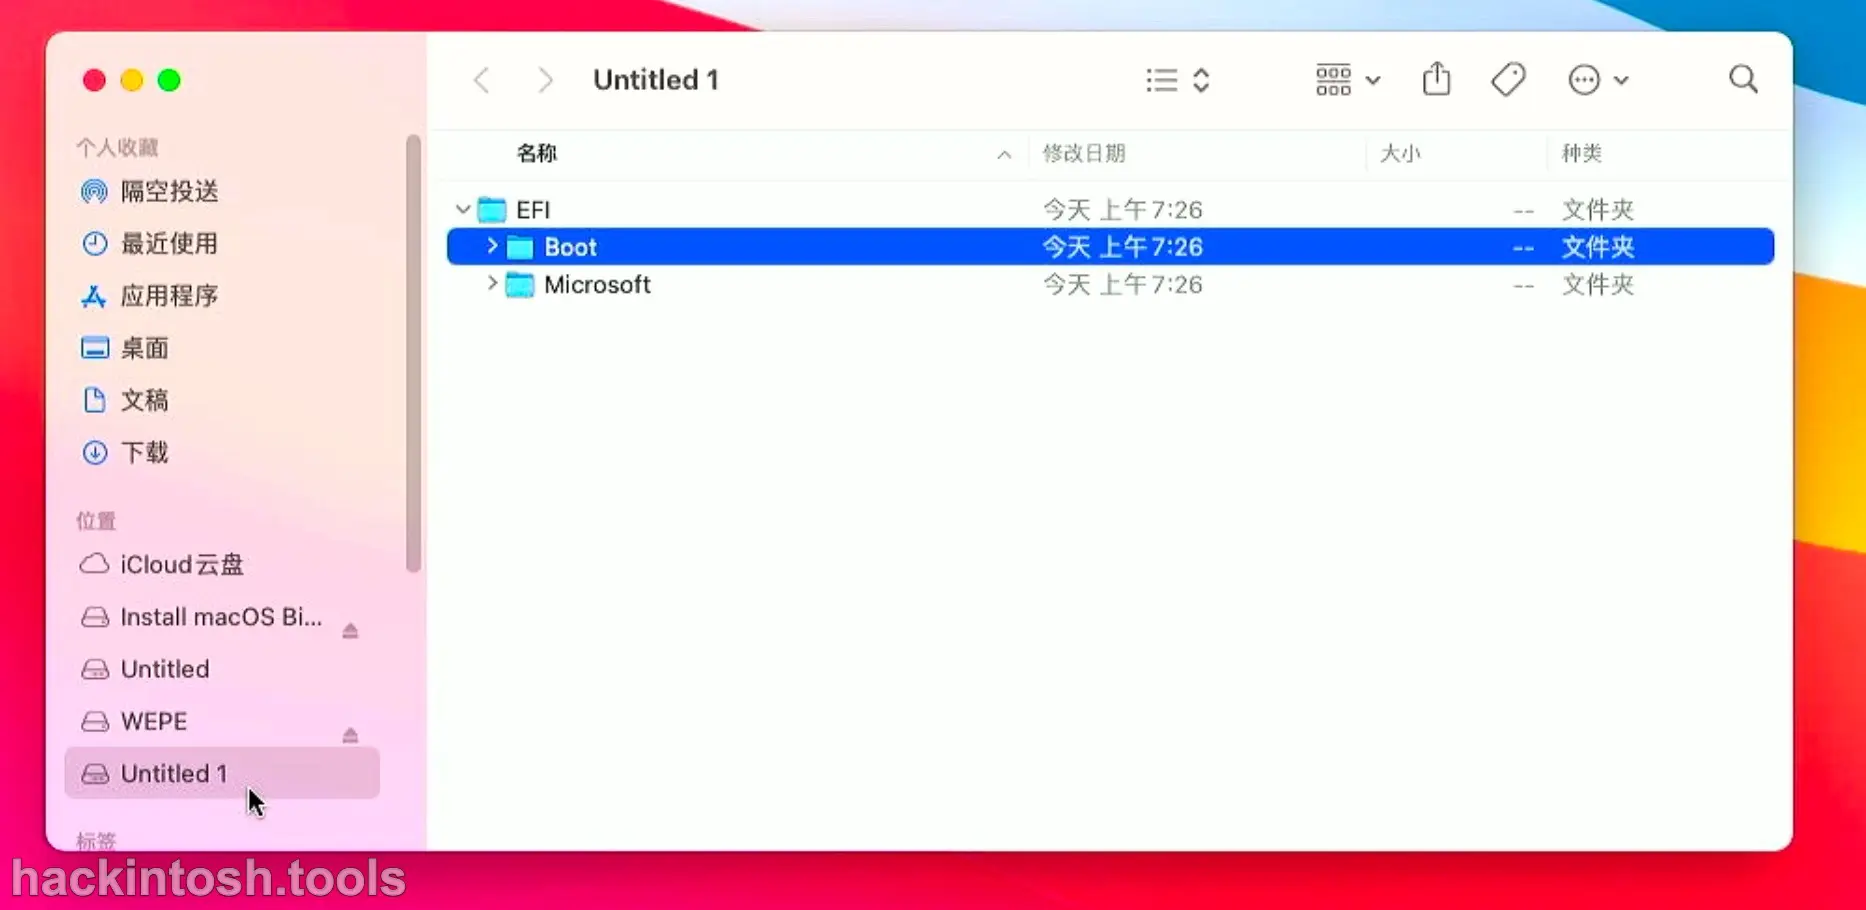
After entering the password, the mounting will be successful. Then click "Open Partition" on the icon in the upper - left corner. The content of the hard disk's boot partition is as follows:
Mount the Boot Partition of the USB Flash Drive
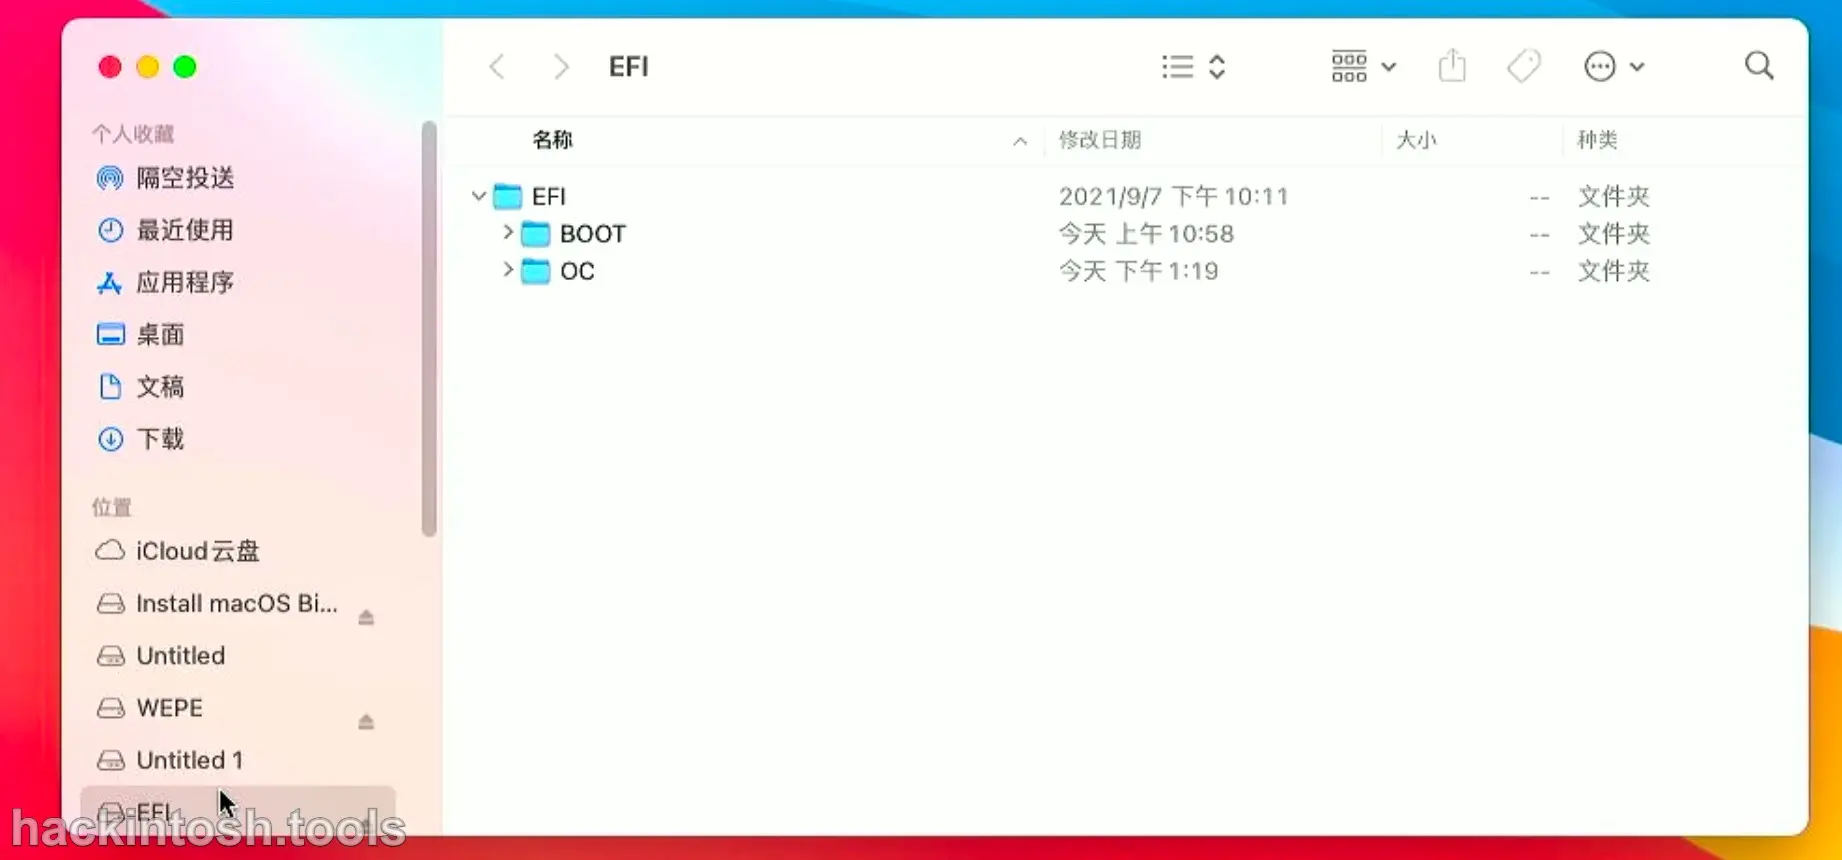
Similarly, mount the boot partition of the USB flash drive. At this time, the content of the boot partition of the USB flash drive is as follows:
Copy the OC Files to the Hard Disk Directory

The task is completed. Now you can unplug the USB flash drive, then shut down and restart to enter the Windows operating system.
Situation Explanation
Multiple Hard Disks and Multiple Systems
For example:
- Disk A: Windows is installed.
- Disk B: macOS is installed.
In this case, you don't need to manually use tools to add boot entries either. Just copy the OC EFI boot file directly to the EFI boot partition of Disk B, and then set the boot of Disk B as the first boot in the BIOS.
Single Hard Disk with Multiple Systems
For example:
- Disk A: Windows and macOS are installed.
In this case, you have to use DG or EasyUEFI below to manually add the boot.
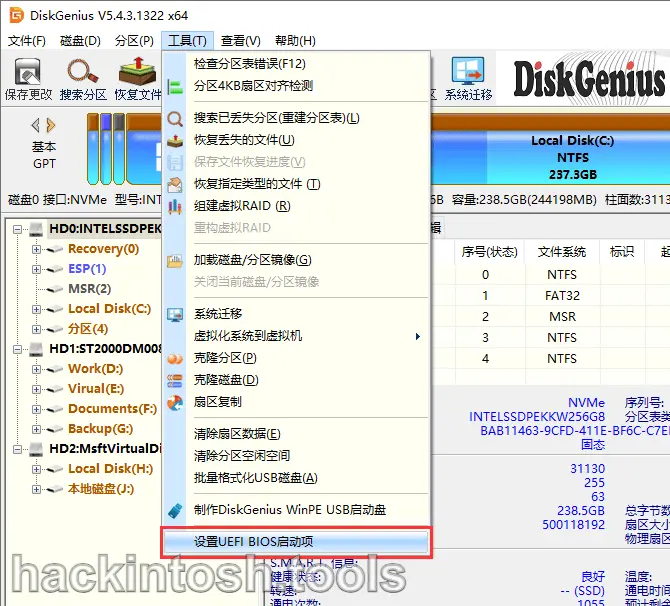
DG Method
Actually, this method is simpler, and the principle is exactly the same as the EasyIUEFI method below:
EasyIUEFI Method
When in Windows, we can use the EasyUEFI tool to add the boot. Of course, there are also some substitutes such as Bootice. However, this will make the article very long and verbose. So this article only uses EasyUEFI for a demonstration.
EasyUEFI was free when it first came out, but it has gradually become charged later. So I'm using a cracked version copied from the Internet here. Please check the file security by yourself.
Download address of the cracked version of EasyUEFI: https://sqlsec.lanzouw.com/i4amxzmj1cj
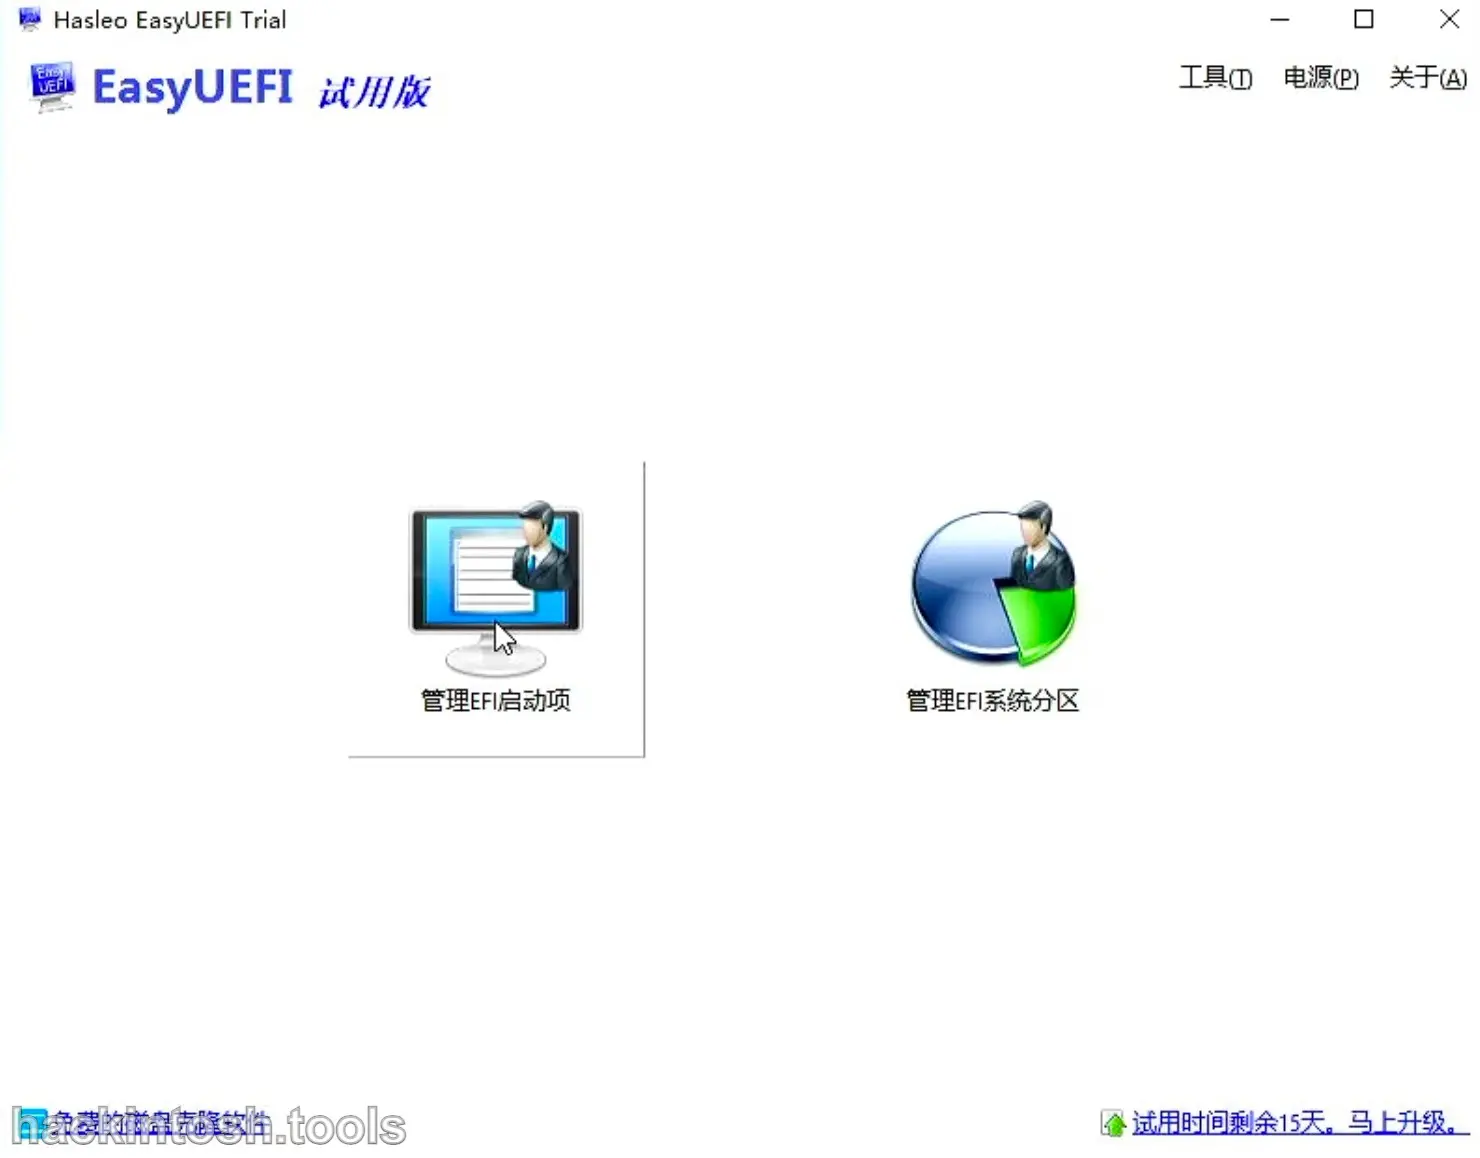
The green version can be used by just clicking. The main interface after opening is as follows:
Select "Manage EFI Boot Entries", and the final effect is as follows:
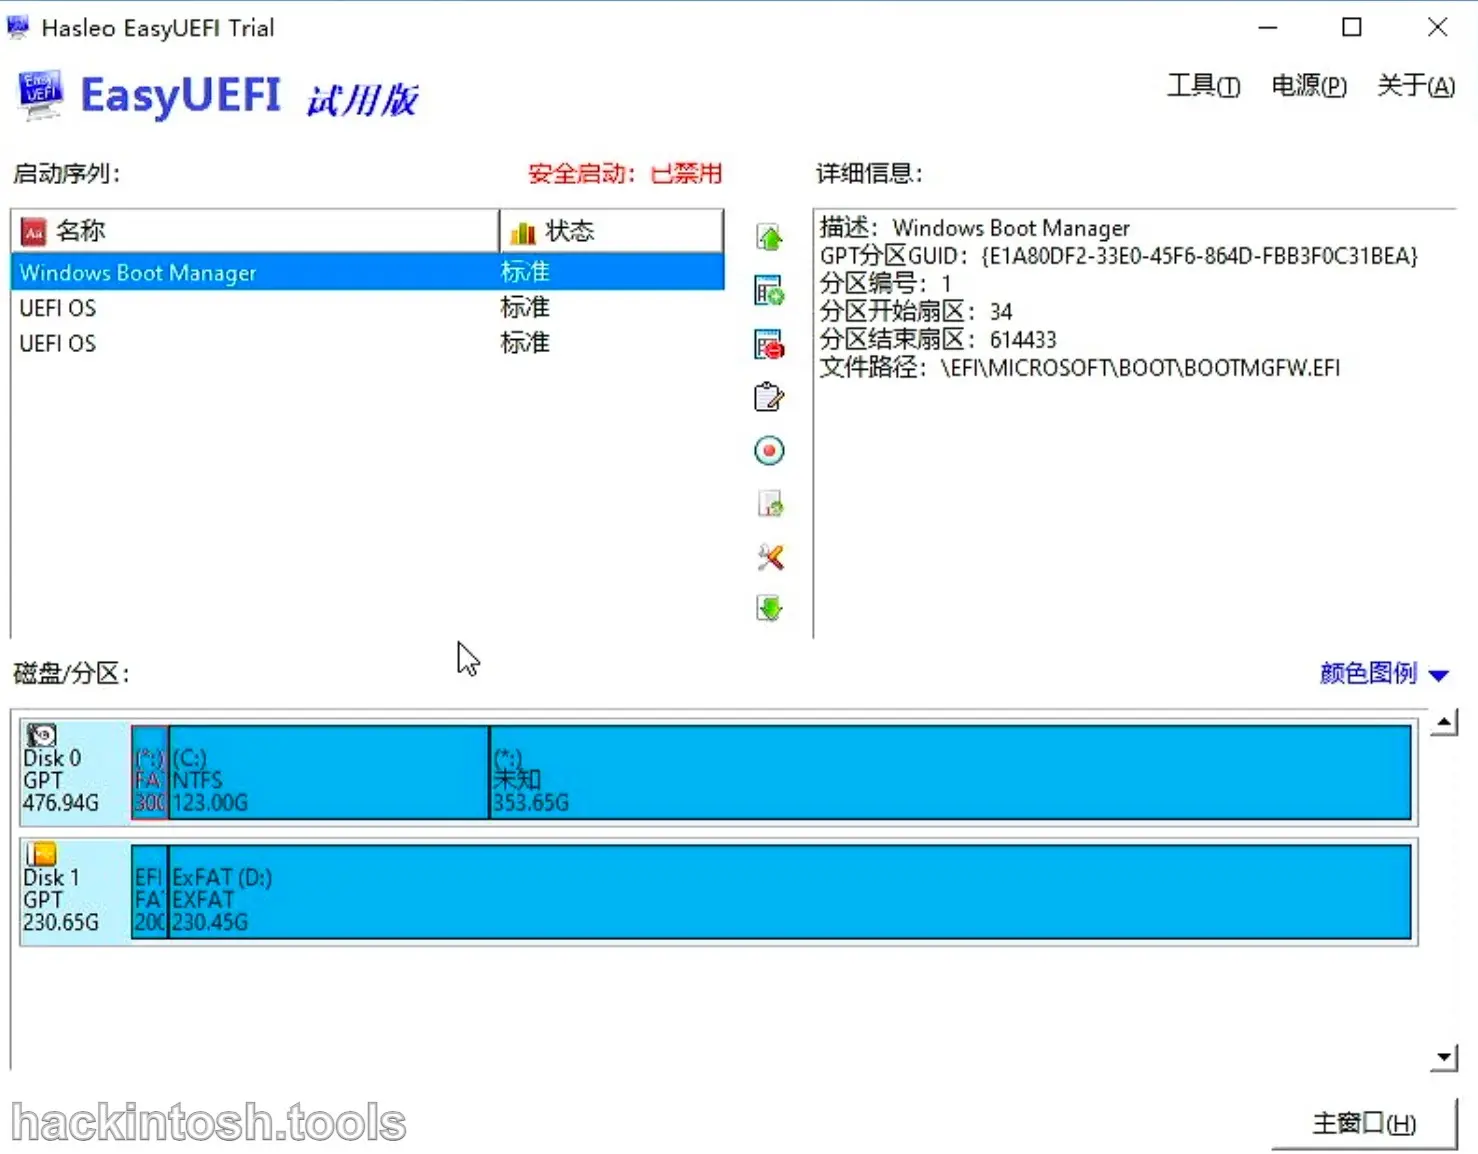
First, click "Create New Entry":

For the operating system type, select "Linux or other operating systems". Write any description. For the target partition, select "The first ESP boot partition of the hard disk", and then click "Browse Data". Select the OpenCpre.efi file in the EFI/OC/ directory, and then click OK:
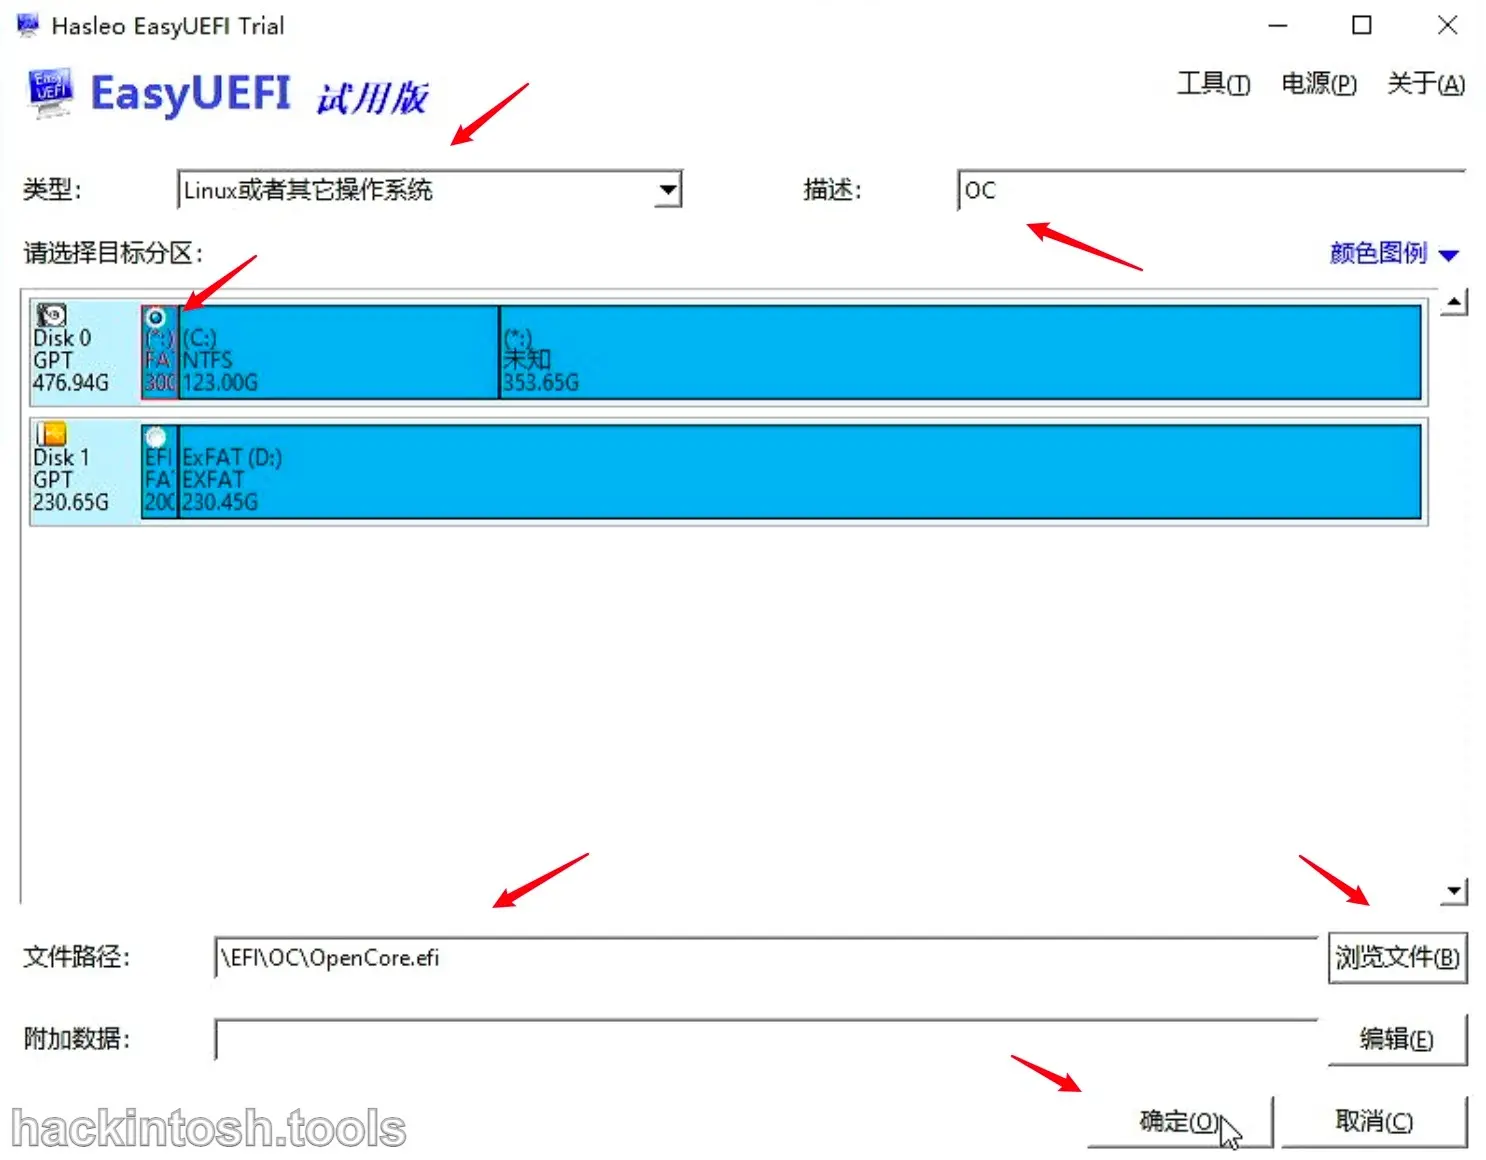
Then move the newly added boot entry to the first position:

The Final Effect
After unplugging the USB flash drive, the interface for selecting the operating system every time you boot is as follows:
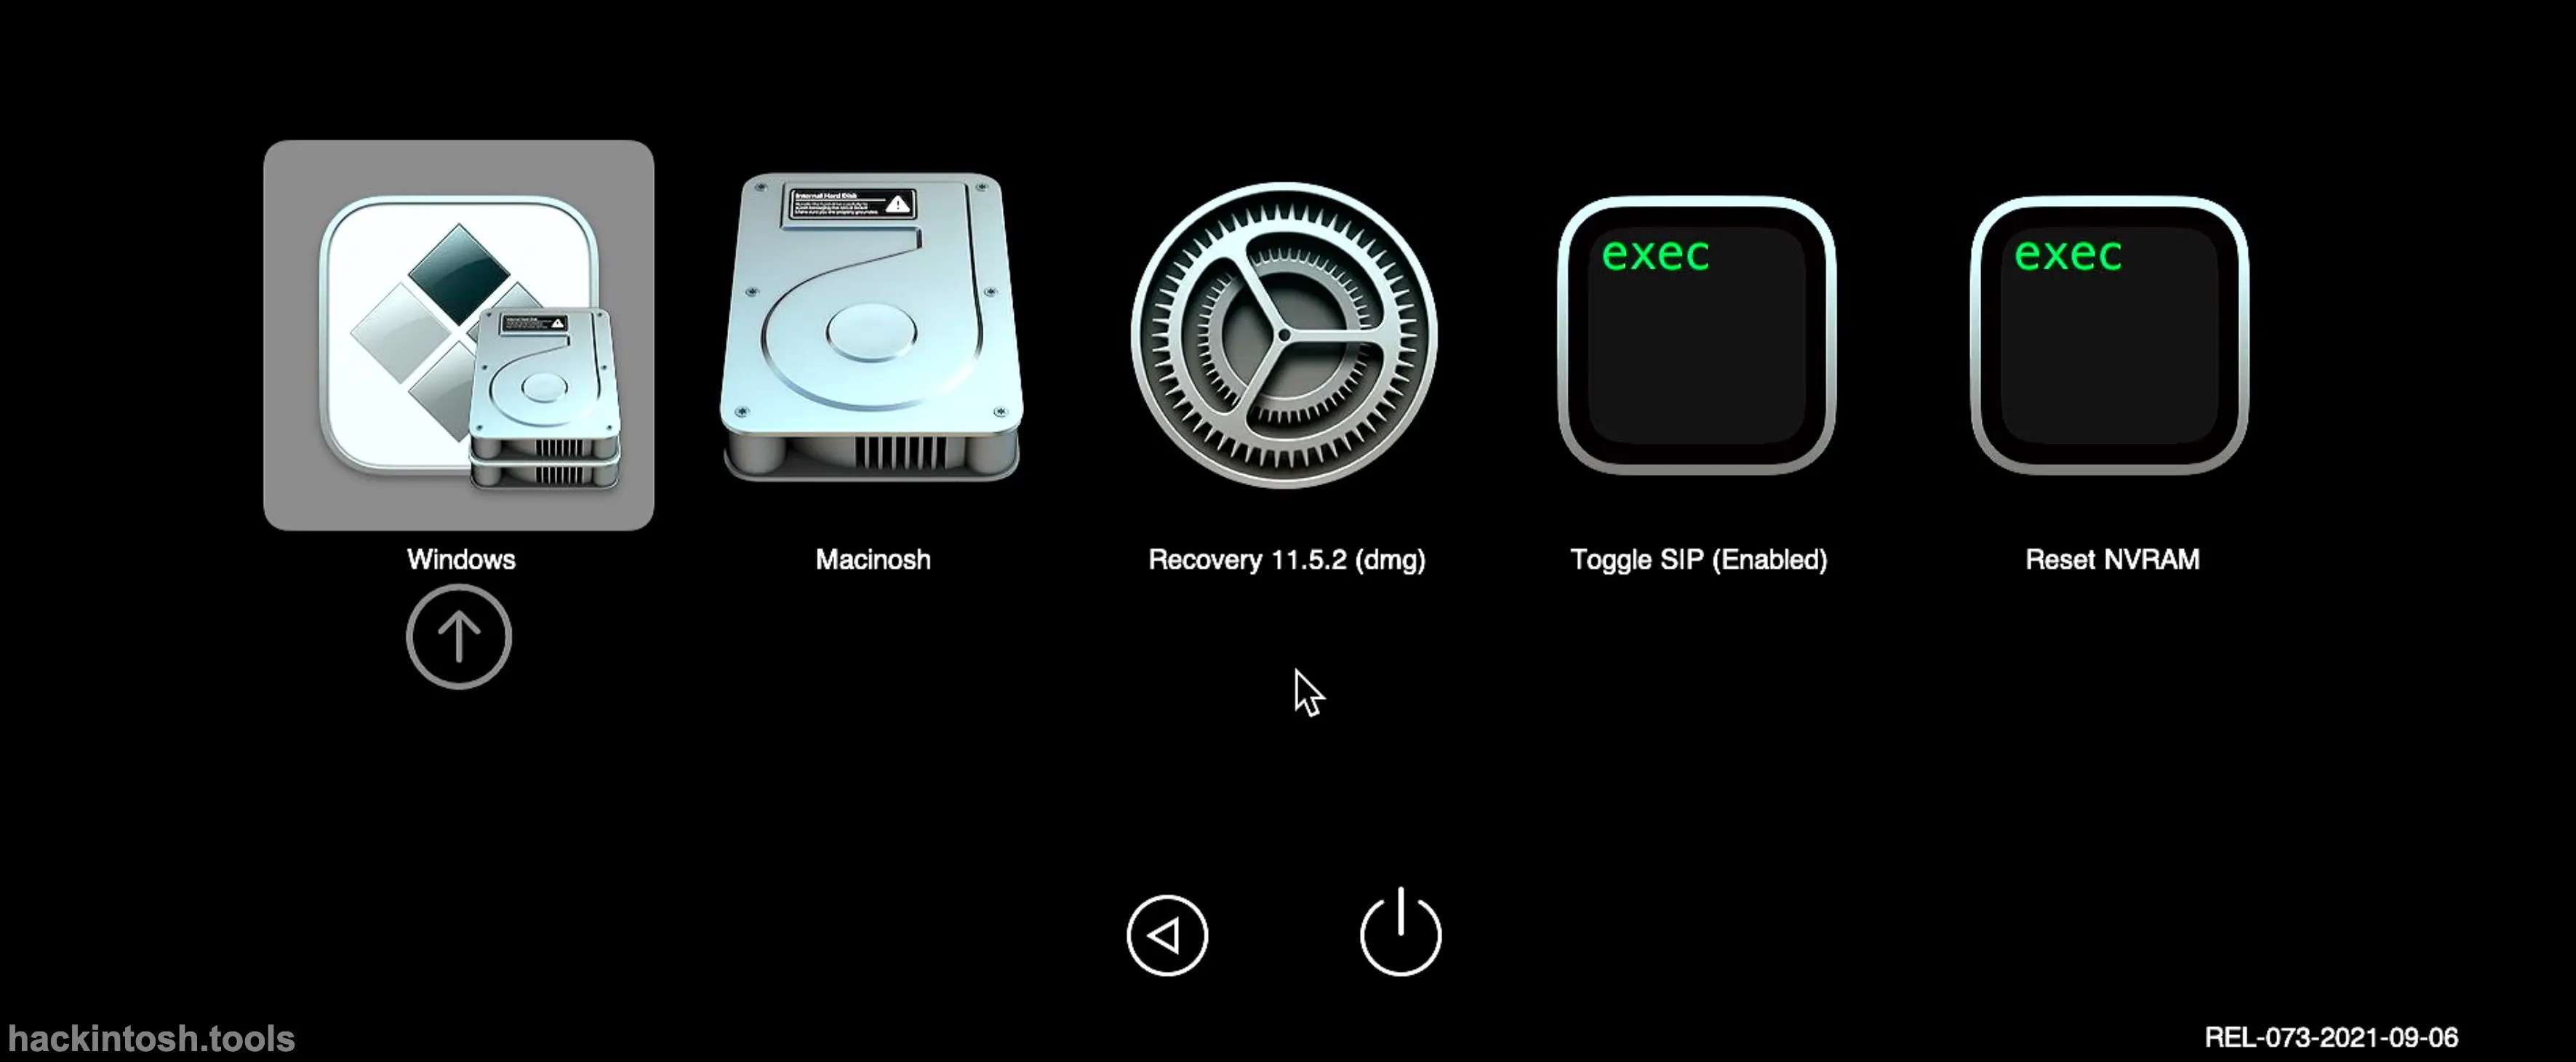
You can easily enter the Windows and macOS systems. So far, it's all done.
No Effect?
If you use DG or EasyUEFI to manually add the boot but still don't have OC as the first boot, it's very simple. Just set the boot you manually added as the first boot in the BIOS.